
Pre-Fab Pages with Github's Automatic Page Generator
In this lesson, we will explore the Automatic Page Generator. This is a feature of Github Pages that, with a press of a button, builds out a nice looking page (e.g. an index.html file) from a pre-designed template.
Since the entire purpose of this tutorial is to create something of our own, from scratch if necessary, this chapter is meant to be entirely optional. Pretty as Github Pages’ templates are, they can’t accomodate the variety of design and expressions that we may want for our personal portfolio page.
However, the reality of modern web development is that you’re almost always starting from someone else’s foundation, and then tweaking it to your needs. Github’s Automatic Page Generator does too much for what we want, but we can still explore how to build on top of its scaffolding.
After it’s done with the auto-building process, Github leaves us with a pile of raw text files – just like every other web project. So if you’ve never built a website, this is a brief practical overview of how things fit together so that you’re less initimidated at the thought of creating a web site from scratch, and that you don’t see it as magic, but something you can freely examine and tweak for yourself.
One of the hardest concepts for non-web-developers to understand about web development is how content and presentation are meant to be kept separate. Even if we won’t use the Automatic Page Generator to build out our own webpages, it’s a great way to interactively explore the concept of how websites can be radically different, in look and layout, even when they have exactly the same content.
If you do like the Automatic Page Generator, you can read Github’s official documentation here. And again, if you’ve ever built or maintained a website yourself, you can probably skip this chapter entirely.
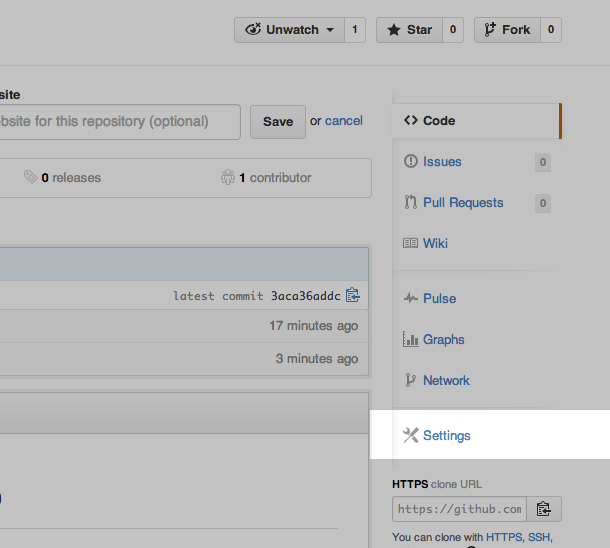
Go back to the top level of your Github repo page, e.g. https://github.com/username/username.github.io
Then click on the Settings link, via the right sidebar.
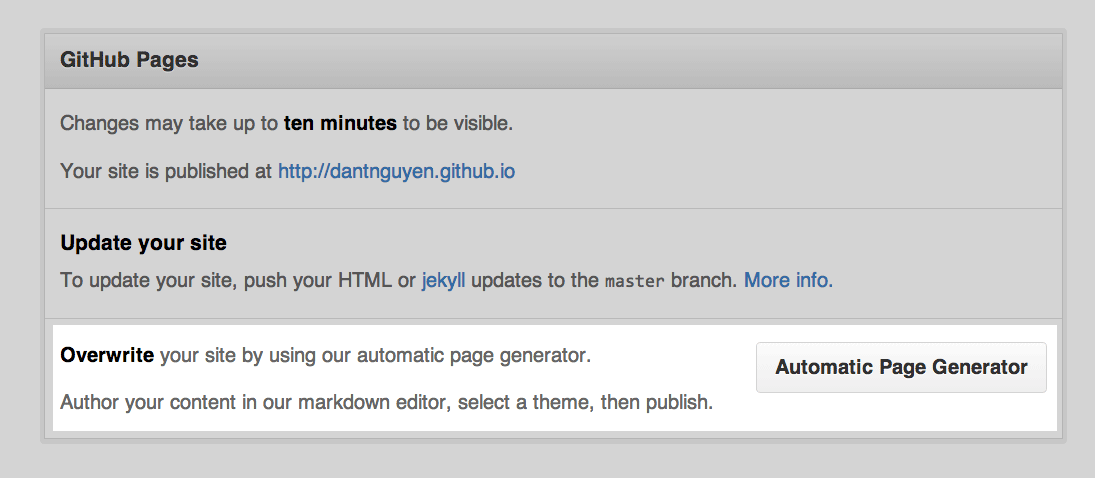
In the bottom half of the Settings page, look for the Github Pages header.
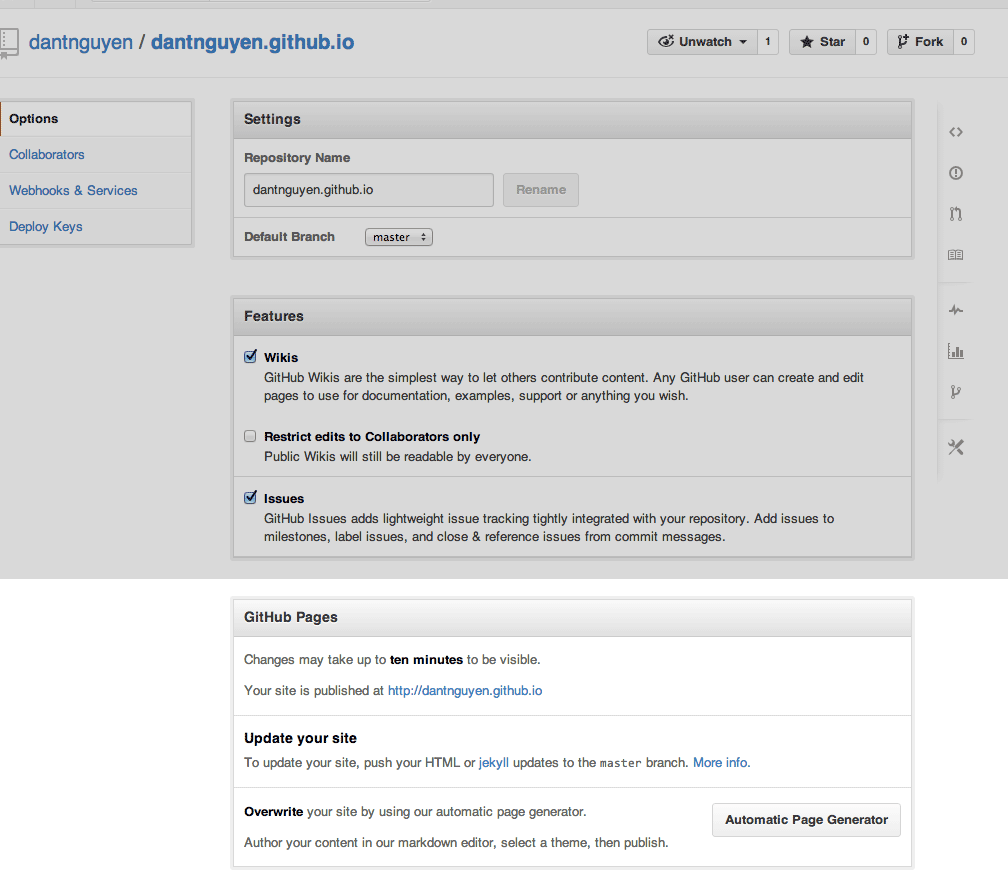
Click on the Automatic Page Generator button
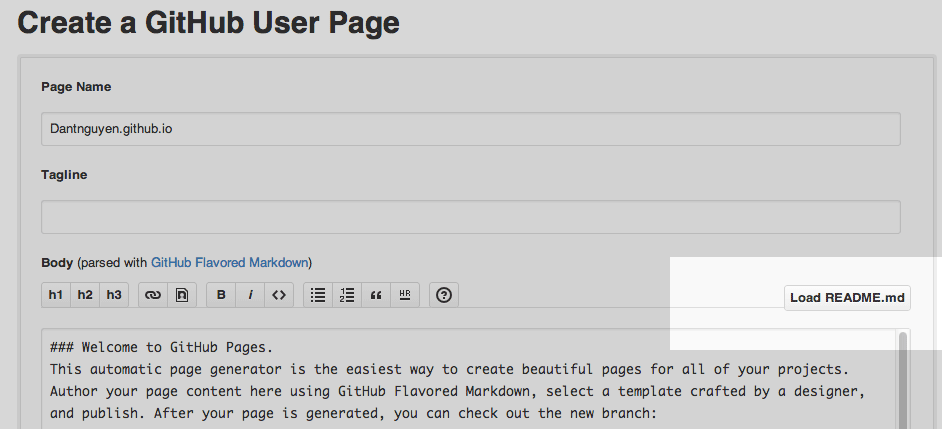
This will take you to a Github file-editing screen, though slightly different than what we’ve used before. This editor is specifically
for creating an index.html page for your Github Pages (i.e. what’s published at http://username.github.io)
You don’t have a choice to name the file, as it is automatically index.html. And the Body text is parsed as Markdown, which is a simplified version of HTML.
If you want my advice, learning Markdown is probably one of the best mini-tech skills that you can pick up, because:
- Markdown takes about 5 minutes to learn.
- Markdown is used in an increasing number of publishing platforms and tools.
- Markdown is way easier to read and write than HTML. In fact, I hardly ever write HTML if I can help it.
Check out the Github guide on Markdown. It’s not important that you master it, just that you be aware of it for now.

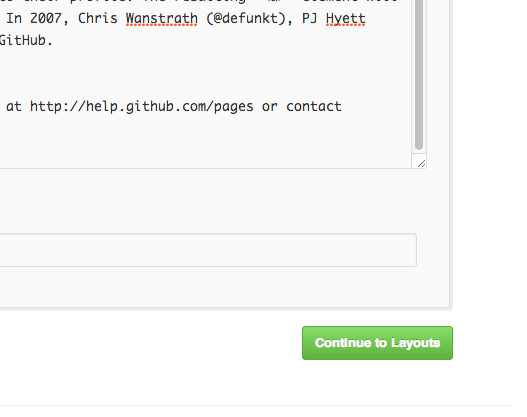
You don’t have to edit anything yet, just leave the default Body content as is if you’d like. Go to the bottom of the page and hit the green Continue to Layouts button.
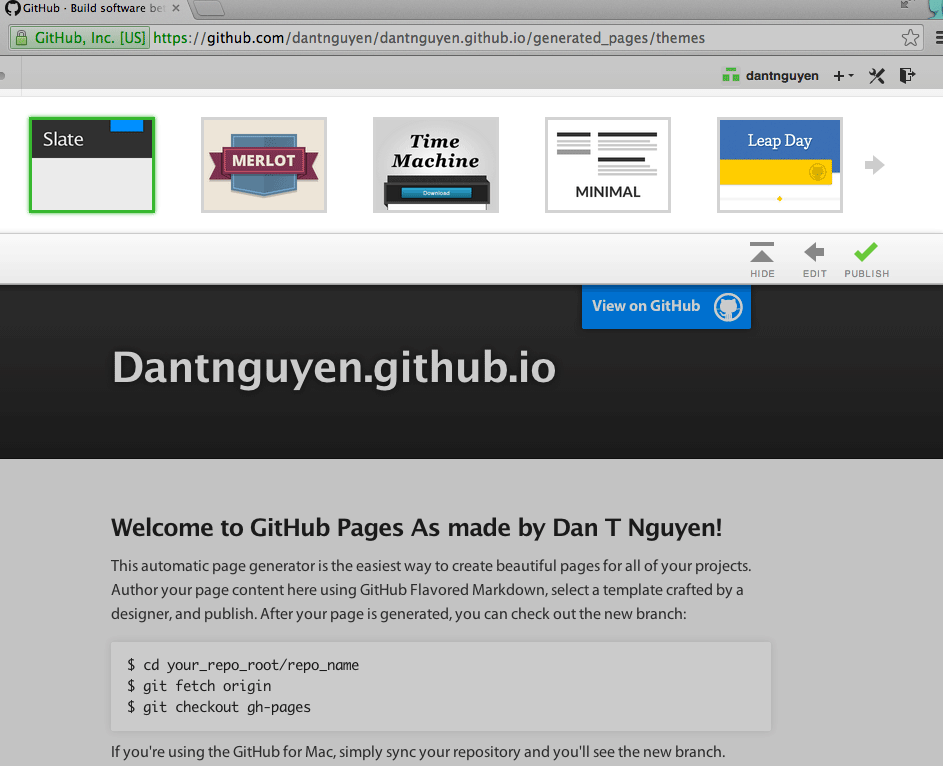
Using a pre-made Github Pages layout
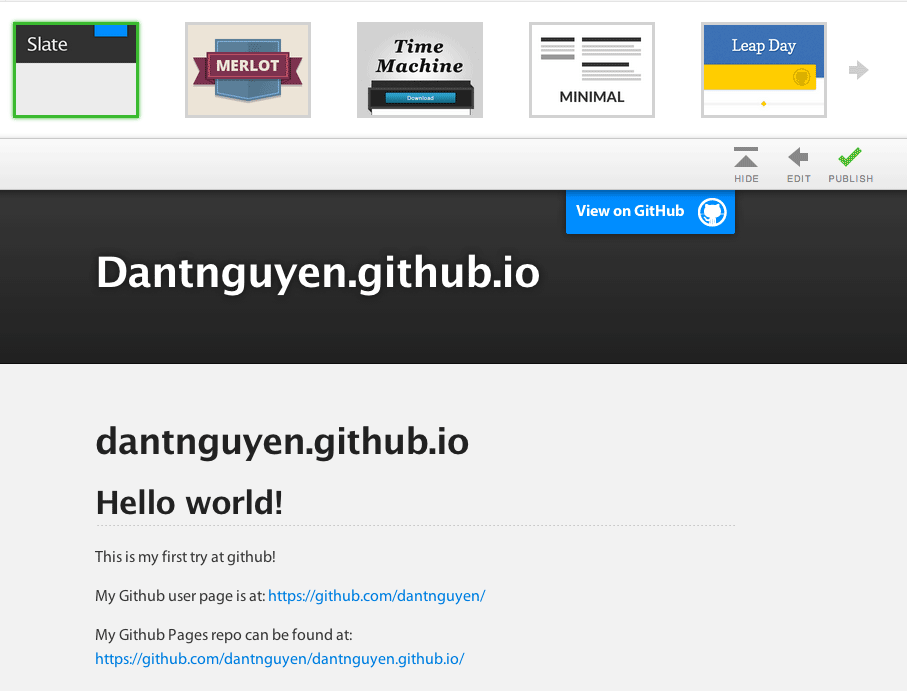
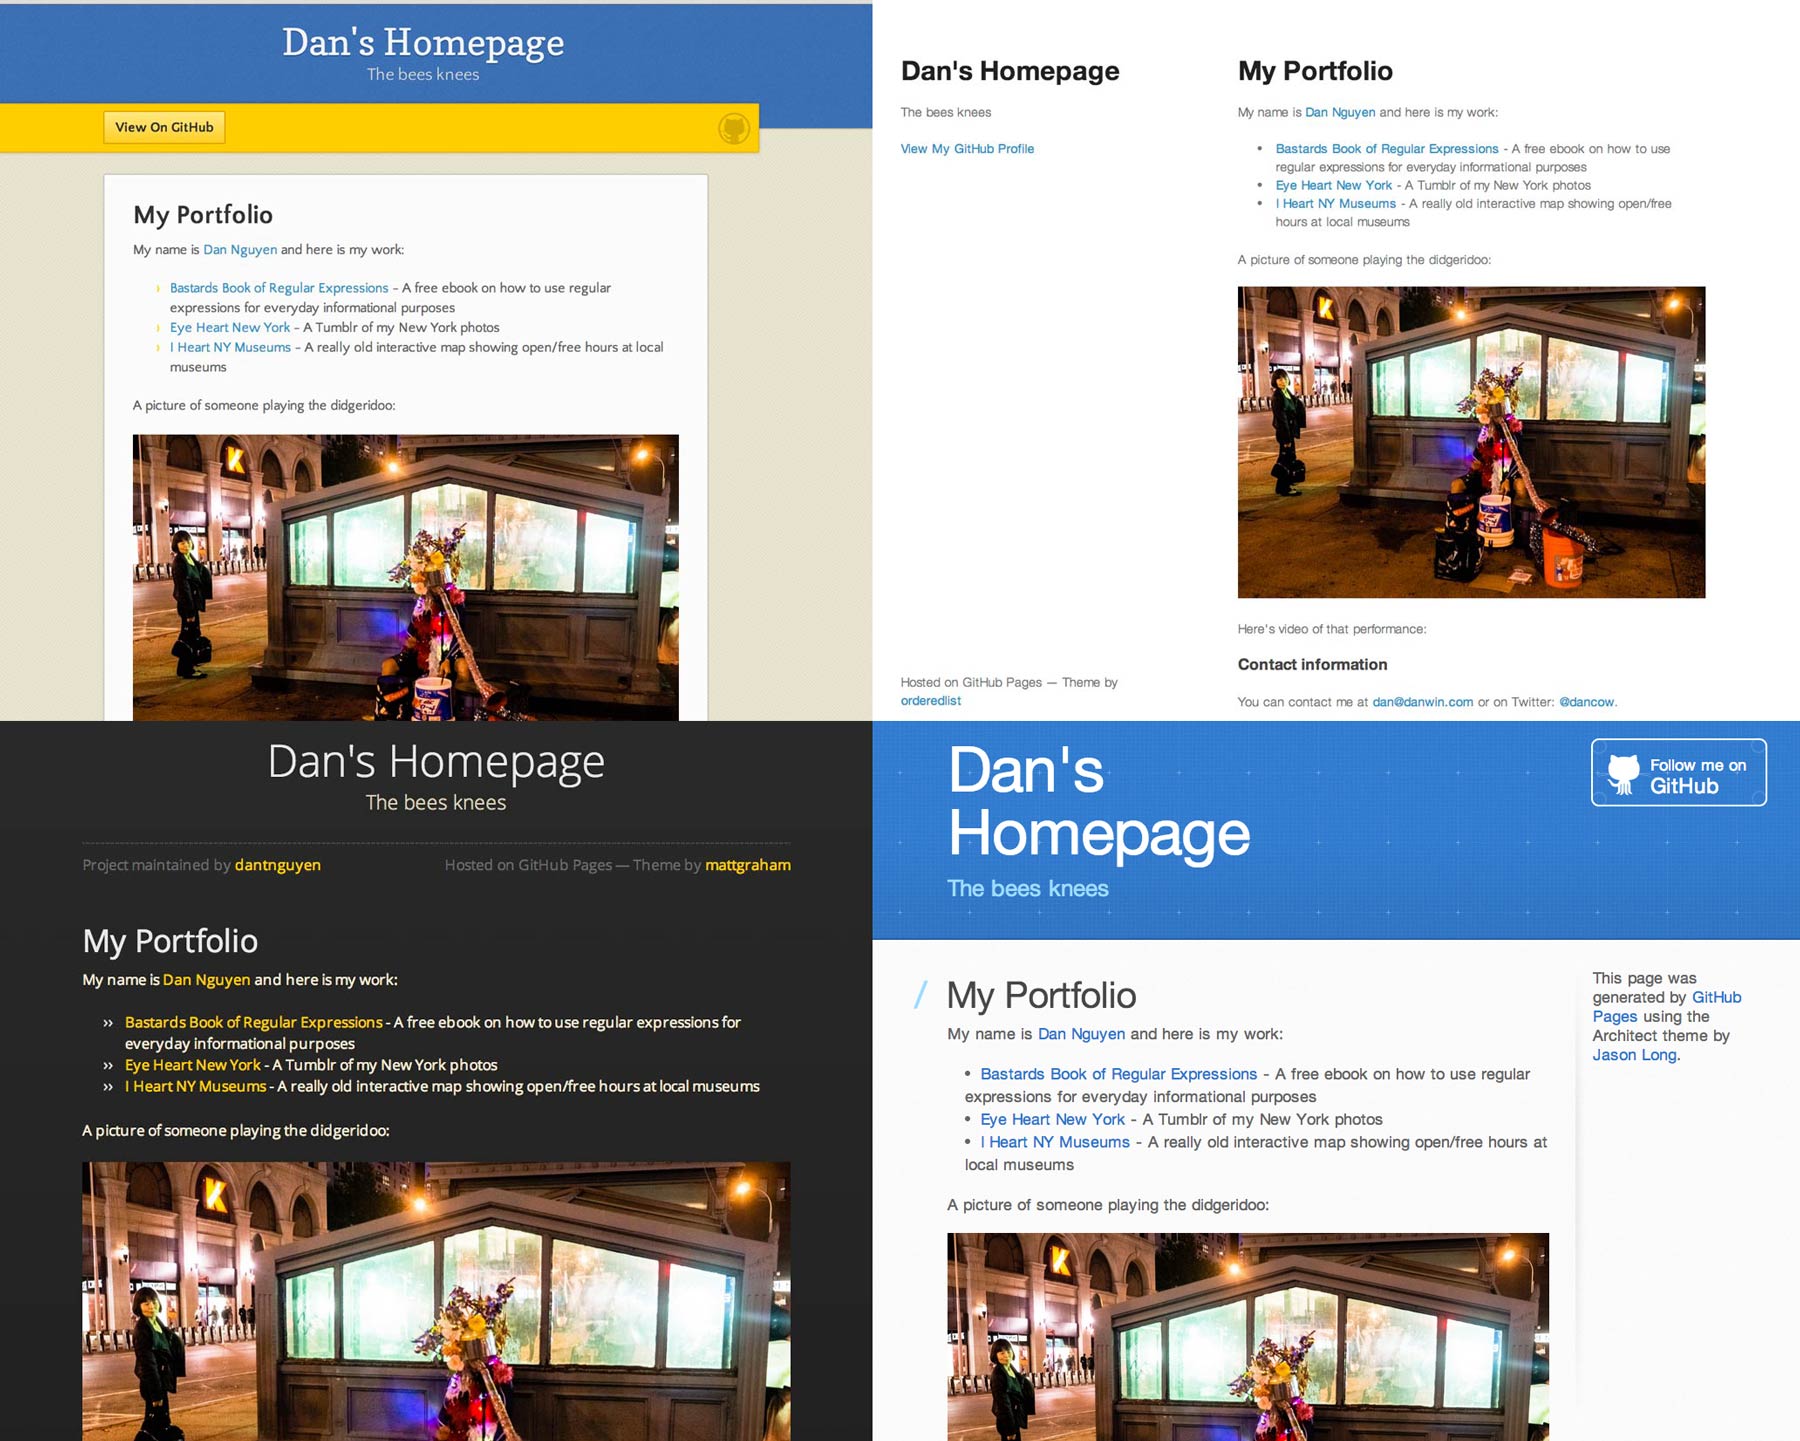
You’re now given the chance to pick from a variety of pre-made Pages layouts. Click on the previews and notice how the content stays the same even as the site’s structure can drastically change.
Click on the green checkmark labeled Publish.
You should be taken back to your Github.com repo page (not your newly created Github Pages homepage). There might be a banner message informing you to wait a few minutes before checking out the changes at http://username.github.io
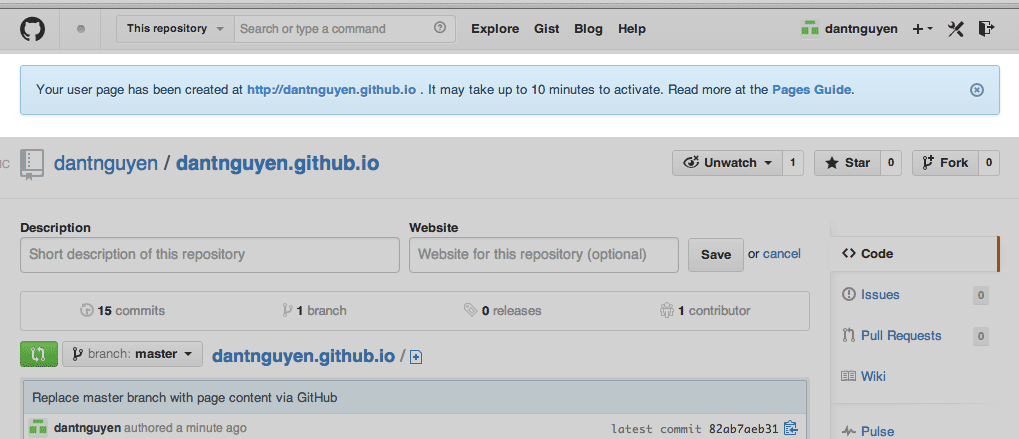
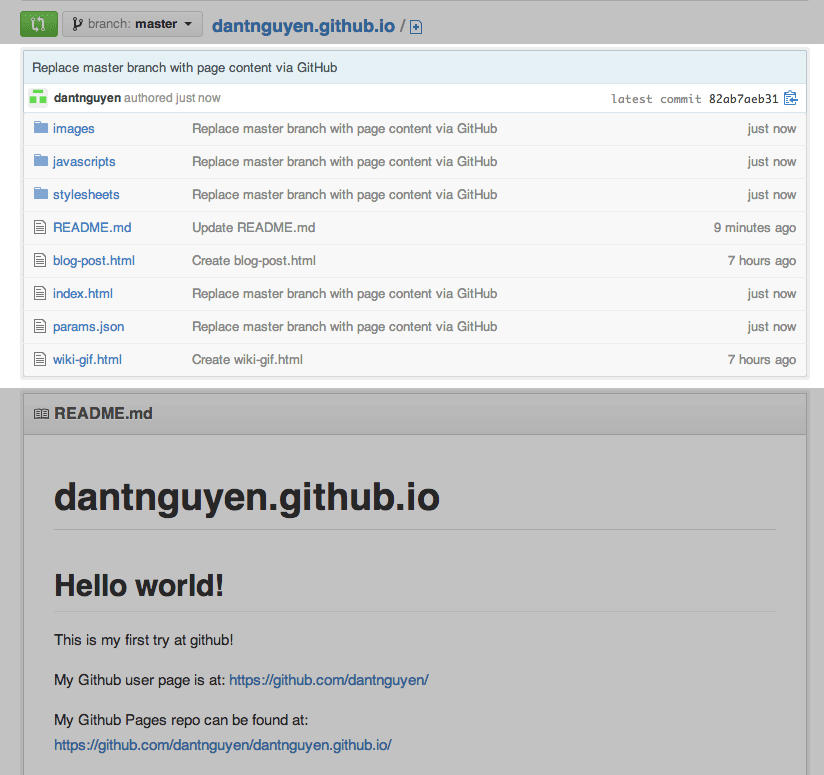
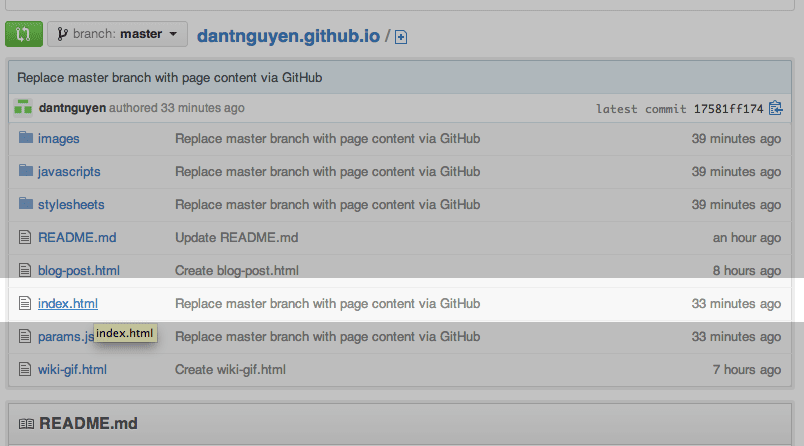
Meanwhile, check out your repo’s file listing. Besides modifying/creating your index.html file, the automatic page generator created a whole bunch of new files and folders.
It should also have left your existing files intact, including README.md
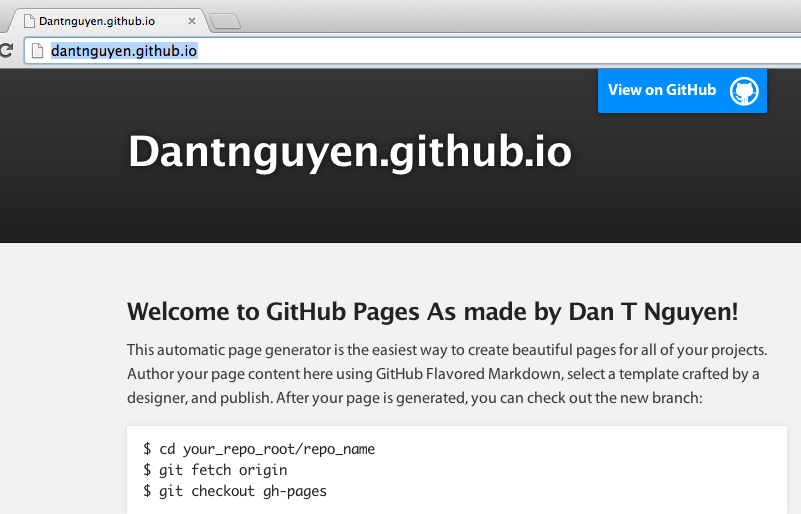
Now checkout your new automatically-generated Github Pages index.html, which can now be found at:
http://username.github.io
(Again, index.html is the default webpage displayed when you’re at a website’s root or directory level)
Your github.io homepage should look pretty similar to the preview you saw in the Layouts-choosing screen.
In the previous chapter, we saw how we had to create raw HTML ourselves in order for index.html to be a real webpage. By using Github Pages Automatic Page Generator, we’ve chosen to yield some power and control for a conveniently-pre-built webpage.
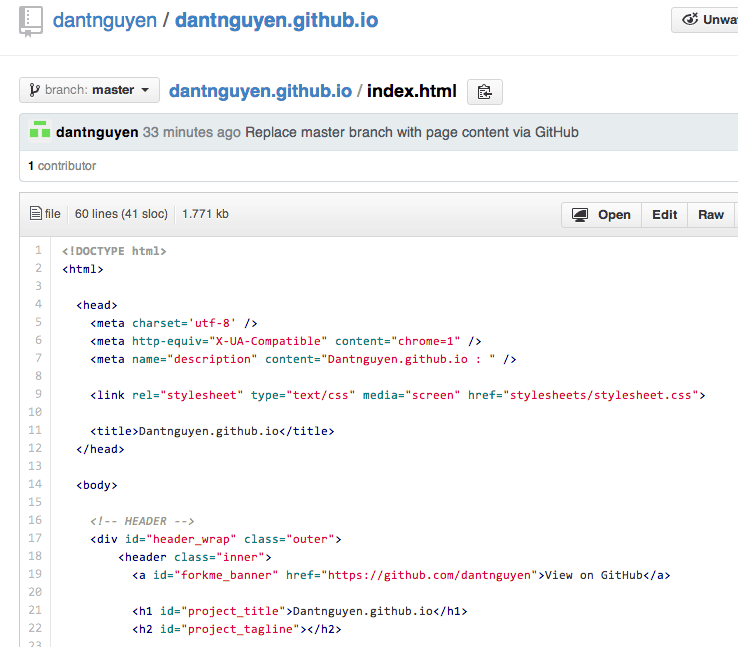
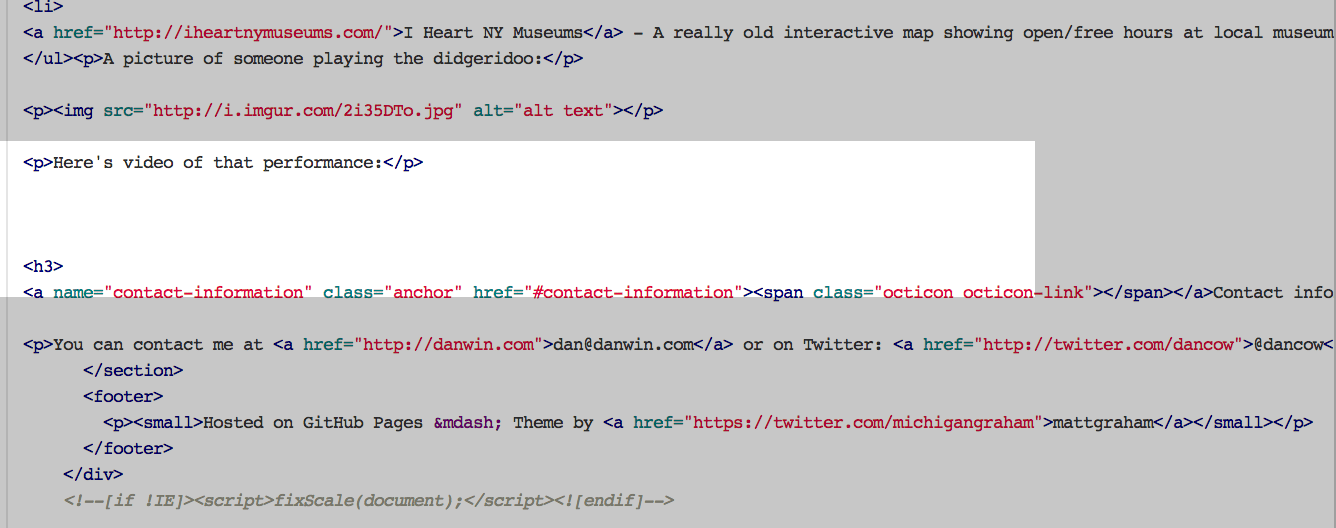
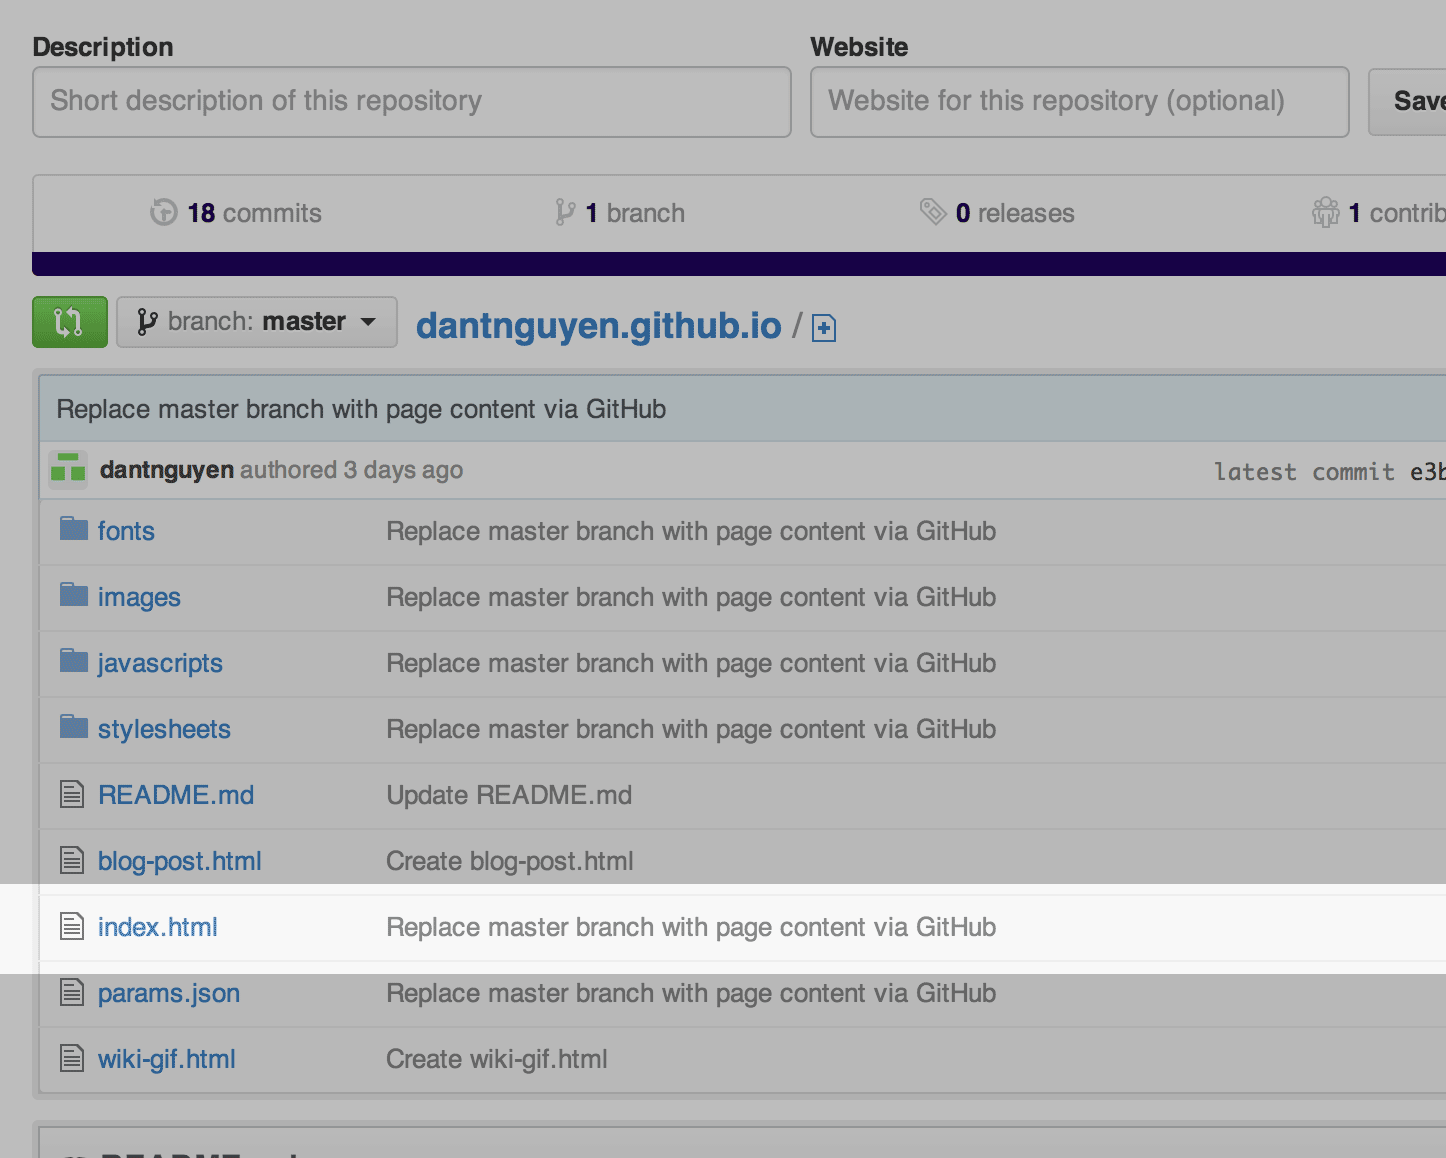
Go back to your Github repo file listing and click on index.html to examine its contents.
All of this raw HTML code was generated for you from the Markdown/text content that was in the Body field, thanks to the Automatic Page Generator.
All of this raw HTML code was generated for you from the Markdown/text content that was in the Body field, thanks to the Automatic Page Generator.
Switching up templates and content
The rest of this chapter will go through the same steps to reiterate the concepts behind HTML and content-generation. If you think you already grok this, then you might as well move on to the next chapter. However, if this is all new to you, it’s worth it to go through the motions. The separation of content from presentation is critical to (sane) web development – and design in general – and Github’s Automatic Page Generator is a great way to interactively see this in action.
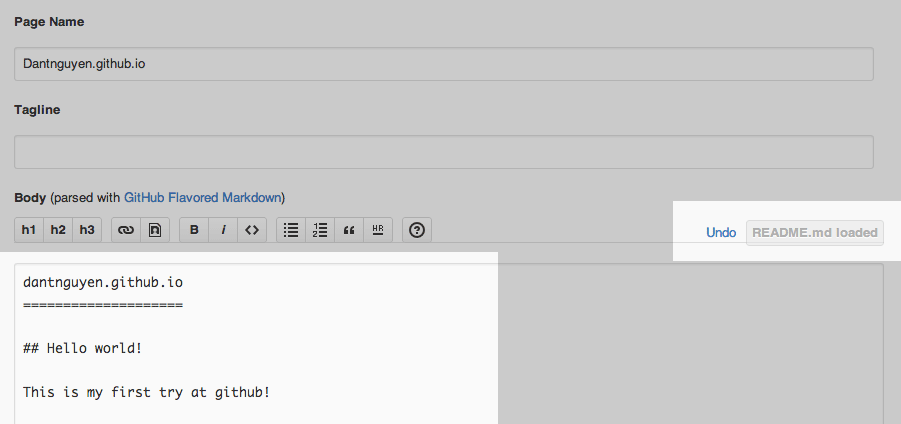
Go back to the Settings page and click again on the Automatic Page Generator button.
This time, click on Load README.md button
This will auto-load into the Body field whatever is currently in your README.md file.
Continue on to the Layouts selection page.
No new insights here. We’ve only replaced the default Body field in Github Pages’s file editor with our own content. Picking out a layout and publishing it is exactly the same as before.
Customizing a new webpage
Customizing a new README.md
Let’s repeat the previous set of steps in which we:
- Start up the Automatic Page Generator
- Load in the contents of
README.md - Choose a layout
- Commit and publish to Github Pages
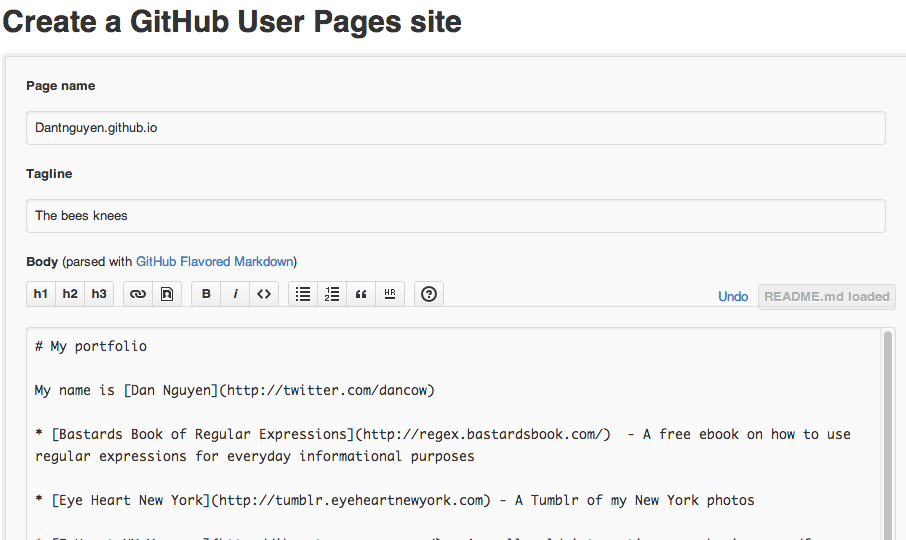
Except this time, edit README.md (before step #2) so that it has content we actually want to publish.
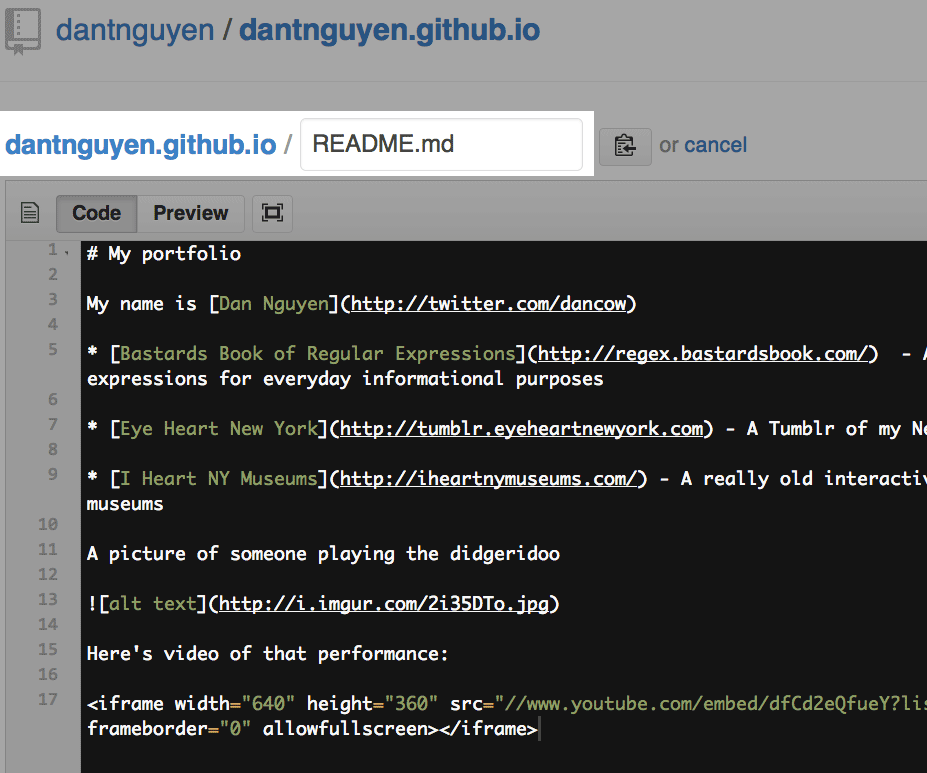
In the adjoining section, I’ve posted some sample Markdown code that I’m using for my own README.md. You can copy and paste it as an example, or just write your own.
# My portfolio My name is [Dan Nguyen](http://twitter.com/dancow) * [Bastards Book of Regular Expressions](http://regex.bastardsbook.com/) - A free ebook on how to use regular expressions for everyday informational purposes * [Eye Heart New York](http://tumblr.eyeheartnewyork.com) - A Tumblr of my New York photos * [I Heart NY Museums](http://iheartnymuseums.com/) - A really old interactive map showing open/free hours at local museums A picture of someone playing the didgeridoo  Here's video of that performance: <iframe width="640" height="360" src="//www.youtube.com/embed/dfCd2eQfueY?list=UUw7F4bJbtGwORQwMBxlGb6w" frameborder="0" allowfullscreen></iframe>
Edit the README.md file and paste in the desired content, then commit the changes.
In the sample code, there’s a couple of lines worth paying attention to:
- This is Markdown for showing the image that is hosted at
i.imgur.com:

- This is regular HTML from YouTube’s video embed code:
<iframe width="640" height="360" src="//www.youtube.com/embed/dfCd2eQfueY?list=UUw7F4bJbtGwORQwMBxlGb6w" frameborder="0" allowfullscreen></iframe>
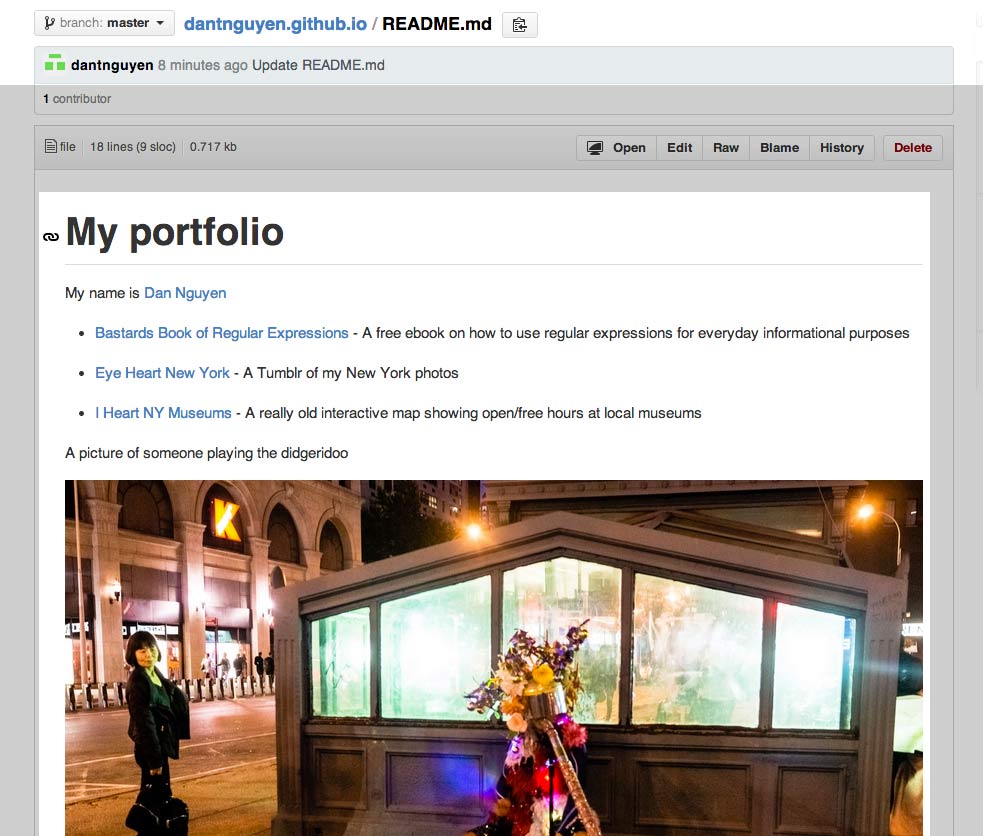
Again, as a feature, Github automatically renders the content of README.md as HTML. This is a convenience so that your repo homepage has something interesting to look at besides the file listing.
For the most part, the style is generic. And certain kinds of HTML, such as that YouTube embed, don’t show up at all. If you click the README.md file to see its specific page in your repo, and click the Raw button (or just re-edit the file), you’ll see that the YouTube <iframe> code remains intact. It’s just that Github’s README.md rendering code has ignored it.
Why is that? Probably because Github doesn’t want repo/README pages to turn into MySpace for Geeks. Again, user-freedom and convienence are often at ends with each other when it comes to software as a service.
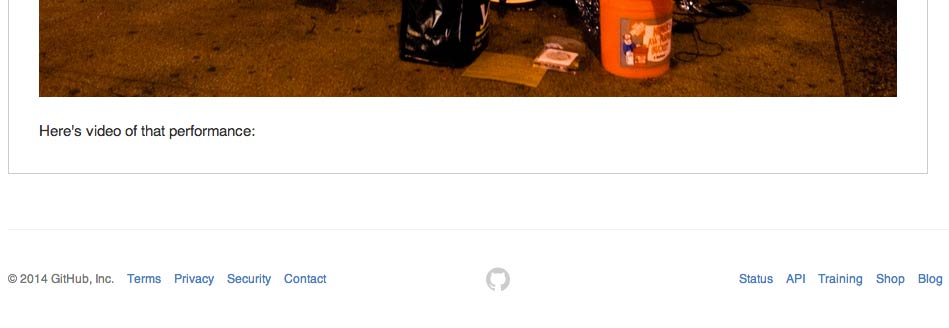
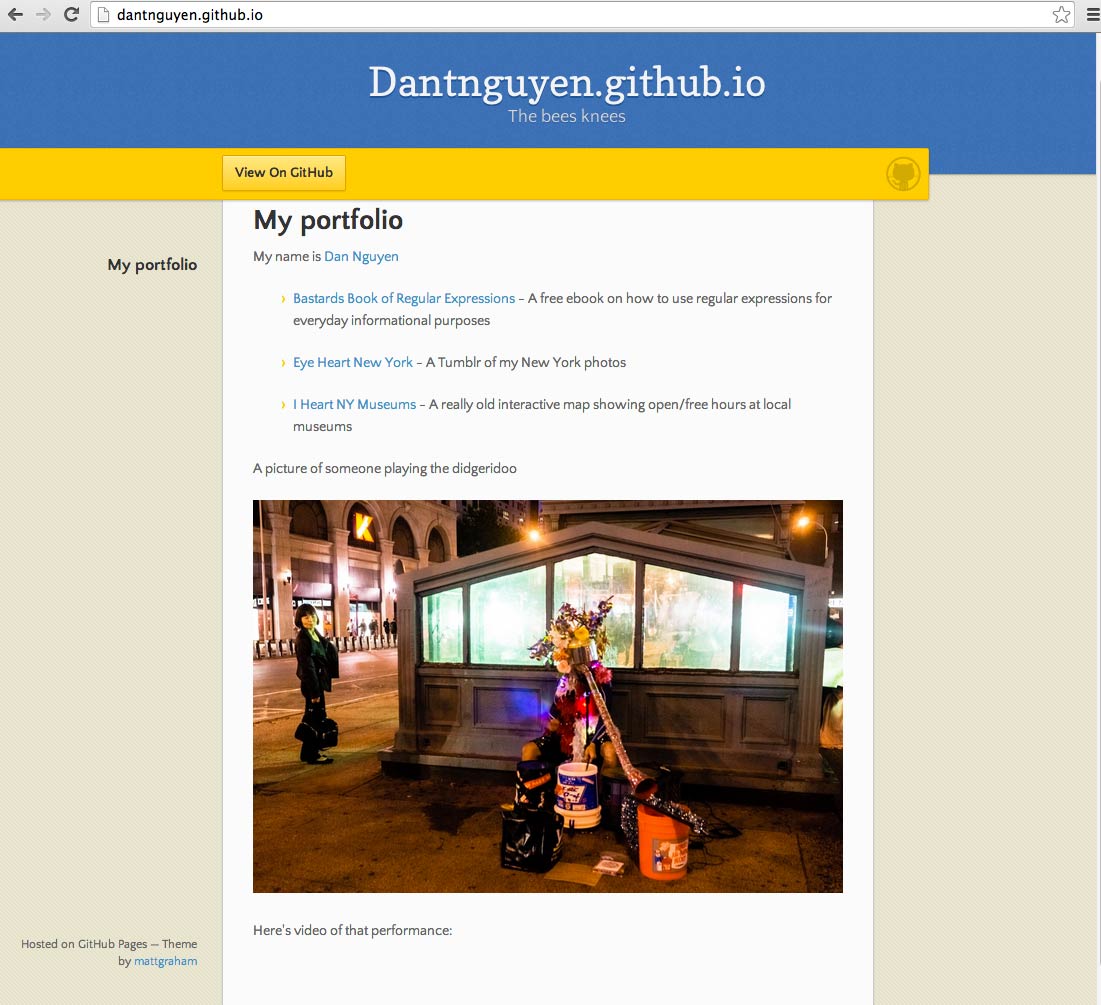
Notice the blank spot where an embedded YouTube video should be shown:
We’ll add the YouTube embed code in manually. For now, though, we’ve accomplished our goal of making a spiffy README.md . Now go back to the Automatic page generator and re-generate some new pre-fab Github Pages for yourself.
Again, click on the Load README.md button, then choose a layout, and then hit the Publish button.
And here is how Github’s Automatic page generator prettied up my README.md. Notice again, at the bottom, the lack of YouTube video.
Up to this point, we’ve been letting Github and its Automatic Page Generator do the heavy lifting: we give it some content in README.md, and it produces a nice index.html file – with a package of code files that dictate the styling and structure – and pushes it live to username.github.io. There’s not a lot to grok, we’re just learning how to use this particular feature of Github, the details of which may change as Github refines/redesigns the process.
But the main takeaway for novice web developers is this: Github Pages was able to take the content – i.e. what we put into README.md – and stuff it into a template. You can repeat the process and use different templates with the same content. Some designs look better than others, perhaps, but you can see how the code that dictates the visual design and structure can be independent of the actual content.
We haven’t yet touched the HTML code that structure the content, nor the actual design code, which typically consists of Cascading Style Sheets, i.e. CSS.
Editing HTML manually
Going forward, we’re going to assemble our own HTML and CSS files. So consider the work done by Github’s Automatic Page Generator to be the scaffolding from which we work off.
As you’ve seen, this “scaffolding” process has left off some of our custom code, e.g. the YouTube video embed code.
Go to your portfolio homepage and View Source to see what happened to the YouTube embed code. The Automatic Page Generator simply left it out.
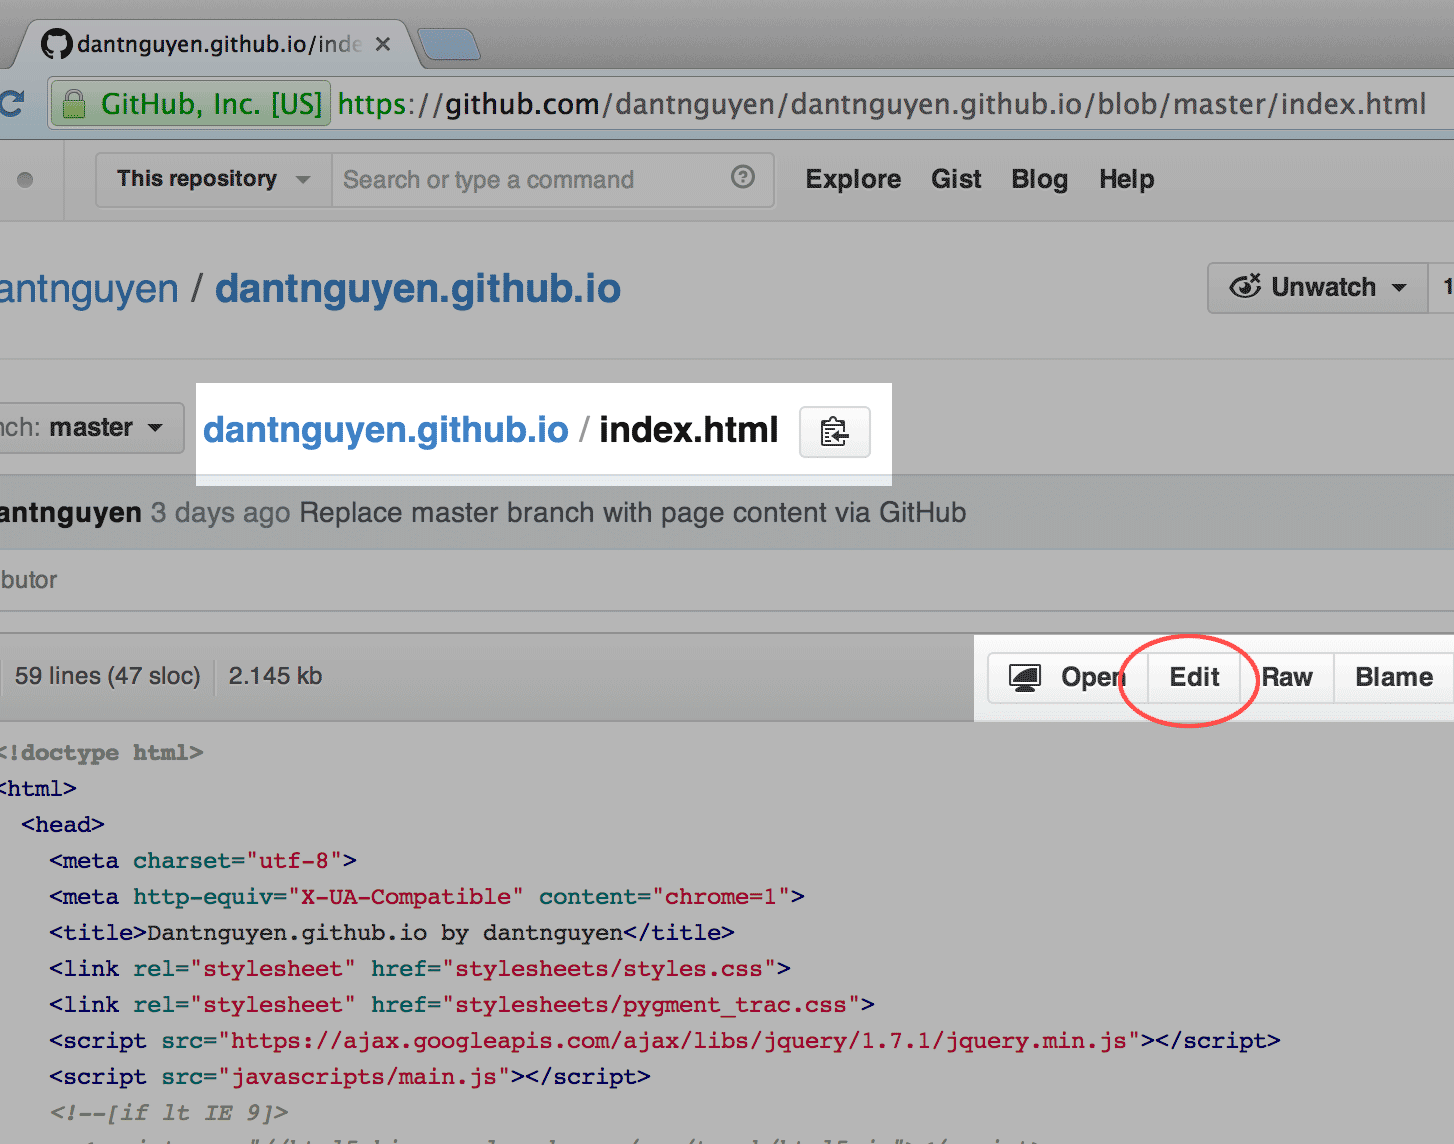
You can rectify this by going to your Github.com repo page:
e.g. https://github.com/username/username.github.io
– and click the index.html link:
Click the Edit button
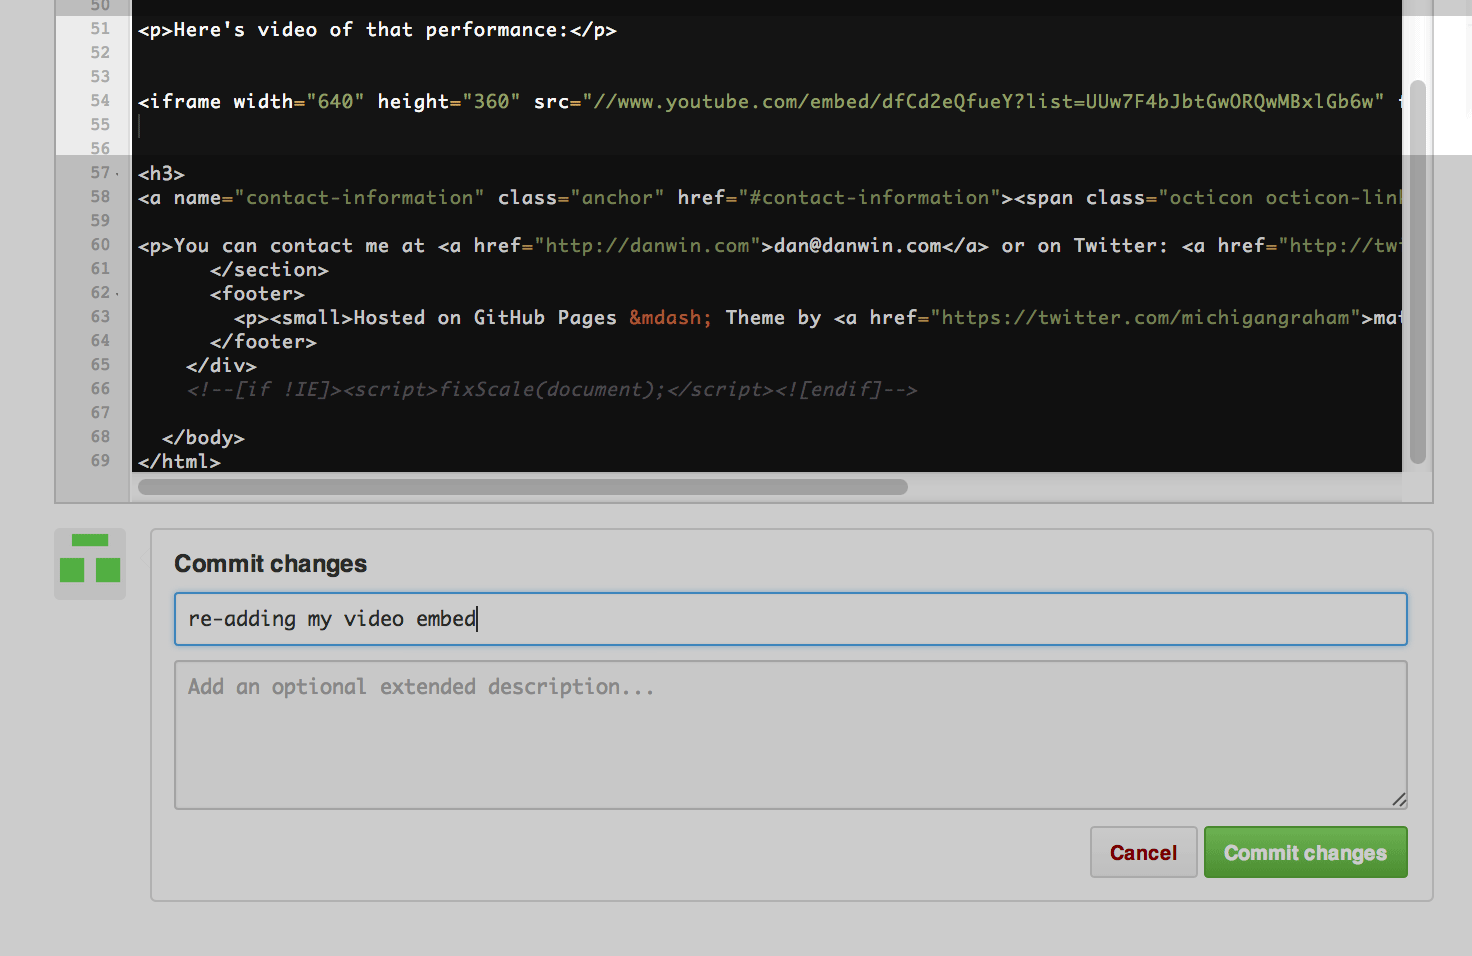
And paste the YouTube video embed code into its proper place, e.g.:
<iframe width="640" height="360" src="//www.youtube.com/embed/dfCd2eQfueY?list=UUw7F4bJbtGwORQwMBxlGb6w" frameborder="0" allowfullscreen>
  </iframe>
Then commit the change and re-visit your portfolio homepage (it make take a minute for Github Pages to update the page after you’ve made the commit).
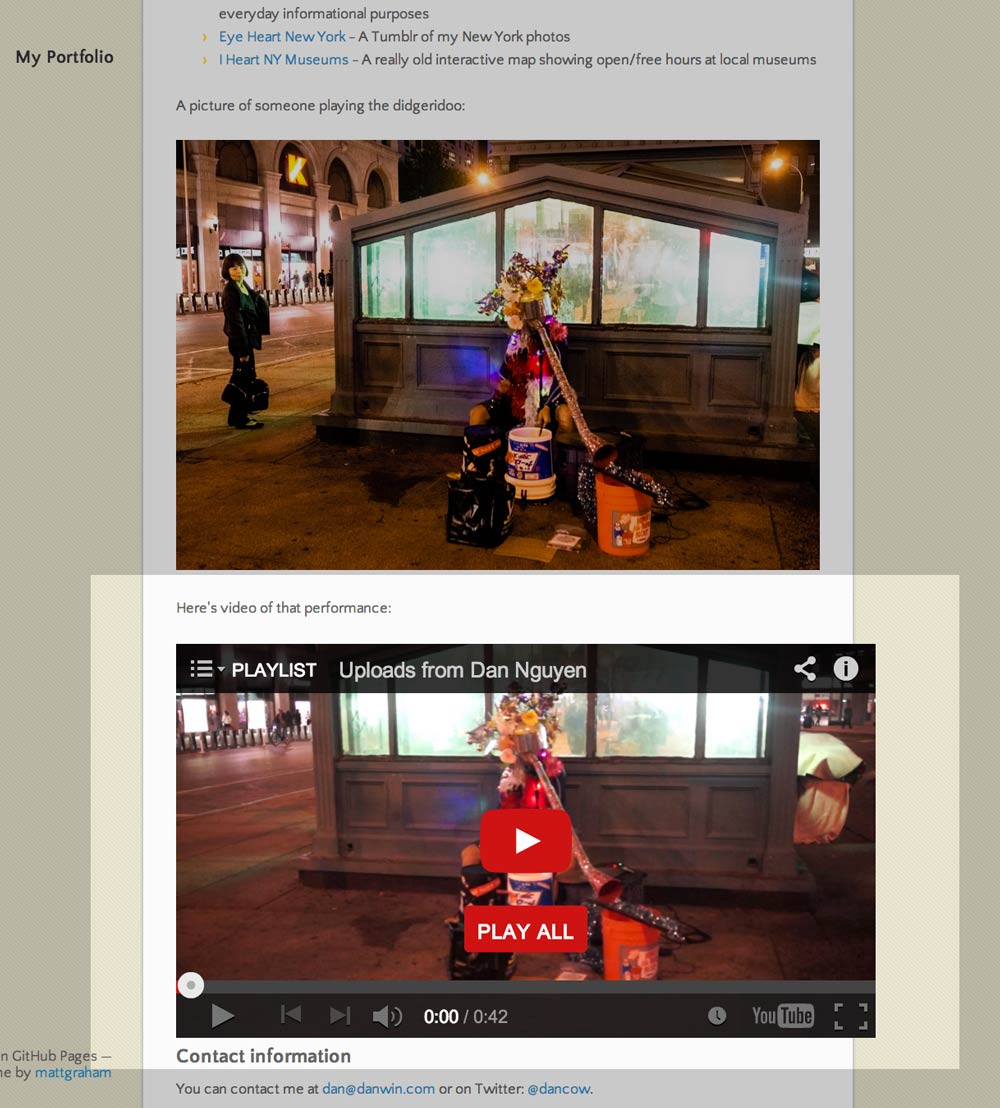
You should now see the YouTube video embedded and playable on the portfolio homepage.
What happened? Again, Github Pages simply takes the code that exists in your portfolio repo and publishes the contents, in this case, the code you pasted into index.html. This is in contrast to the Automatic Page Generator, which does all the hand-holding and code-generating, with the trade-off that it will omit certain kinds of raw HTML, e..g the YouTube video <iframe> code.
From this point on, you’ll be writing your own HTML in order to have complete freedom in building your portfolio.
Things we’ve learned
- How to use the Automatic page generator
- How content can be separated from presentation code.
…more to be written TK