
Clone, Edit, Commit, and Sync
As you’ve probably noticed from using Github’s Automatic Page Generator, or past web-development experience, a website consists of more than just a single HTML file. Besides having multiple pages (i.e. multiple HTML files), most websites also have image files, for example.
By using Github.com’s web interface, we’ve been able to add and edit text files. But, at the time of writing, there isn’t a way to add multimedia assets, such as images, to our repo.
Even if Github adds such an upload feature to its web interface, you can imagine that it will be a bit cumbersome to build an entire website, from scratch, from within your web browser. What would be convenient is if we could build the website on our own operating system, e.g. using the files and folders system that we’ve been accustomed to since the first Macintosh and Windows system.
So this chapter walks through the process of downloading a local copy of our Github repo, editing and changing the files on our own computer system, and then syncing those changes so that they appear on our live Github-powered portfolio pages.
Download the Github application
Github provides a desktop application to let you manage your Github-based repos with a graphical interface. Downloading and using the Github desktop app is entirely optional; most developers manage their repos from the command-line. But using the Github desktop app provides the smoothest transition from the web-browser editing we’ve done so far.
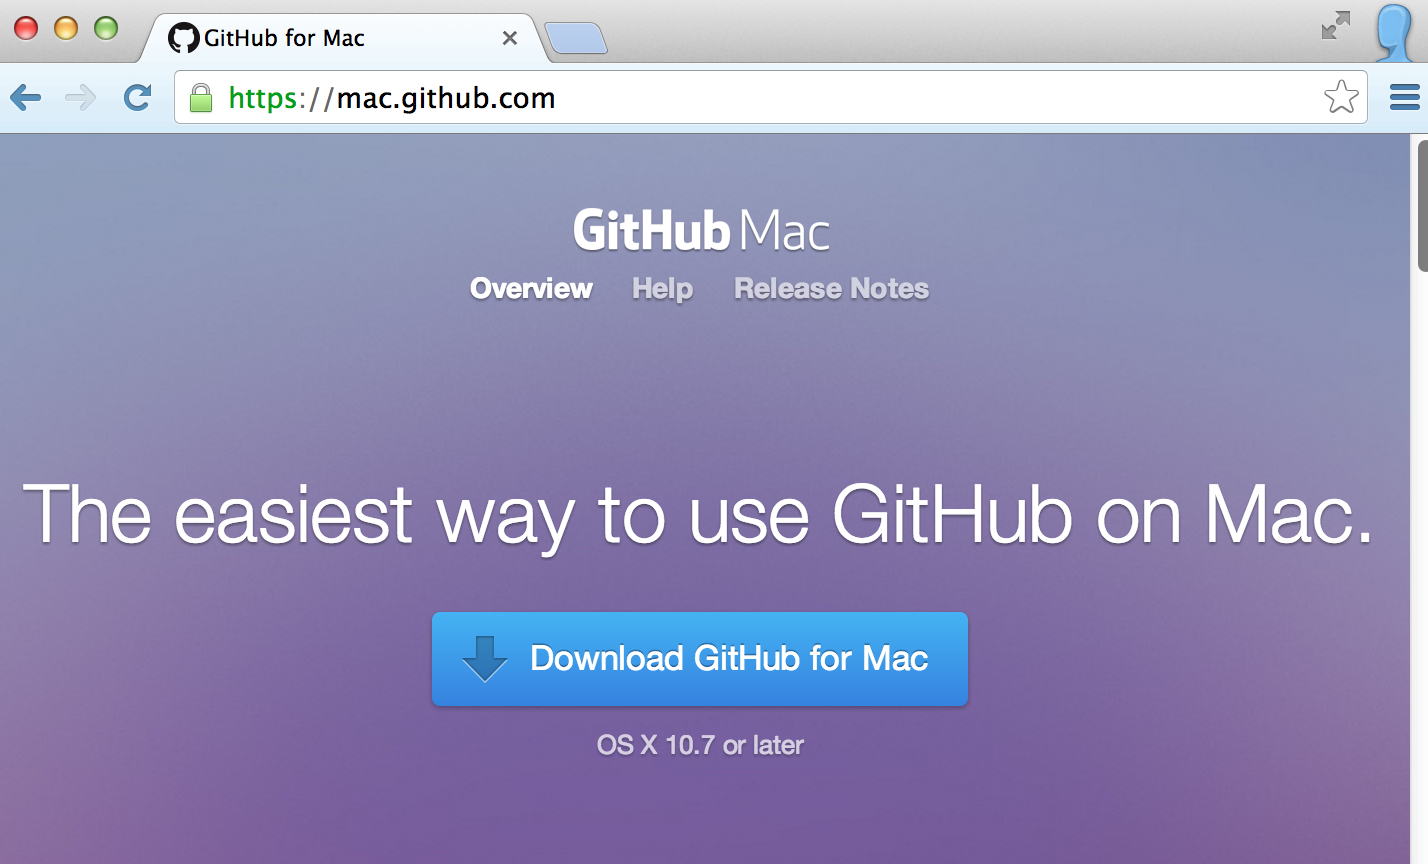
The Github app for Mac can be found here:
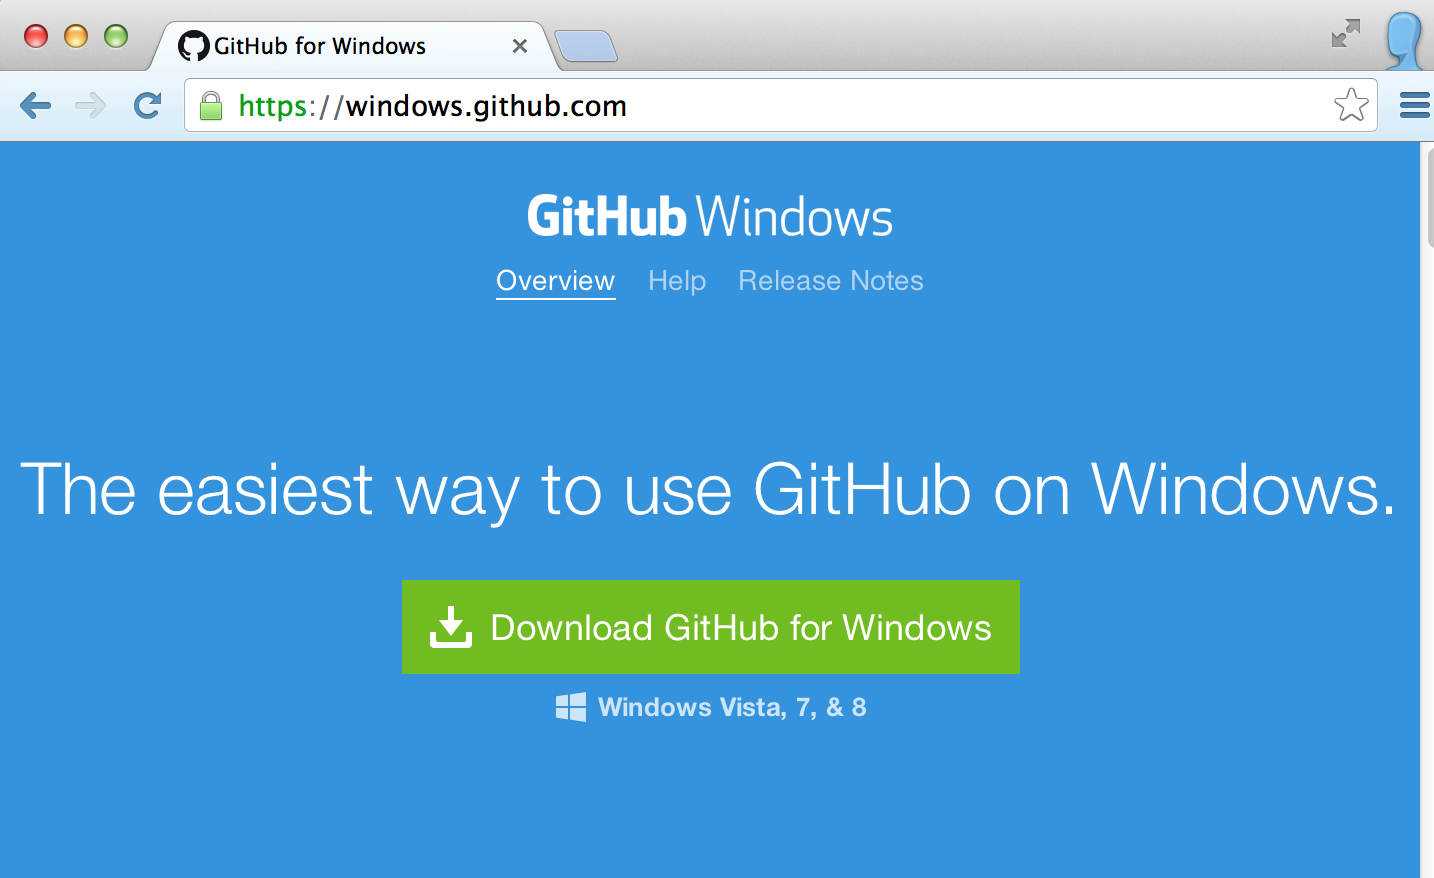
The Github app for Windows is here:
Github also has online documentation for its desktop app, but assumes you’re using it to do the full range of Git/Github functionality.
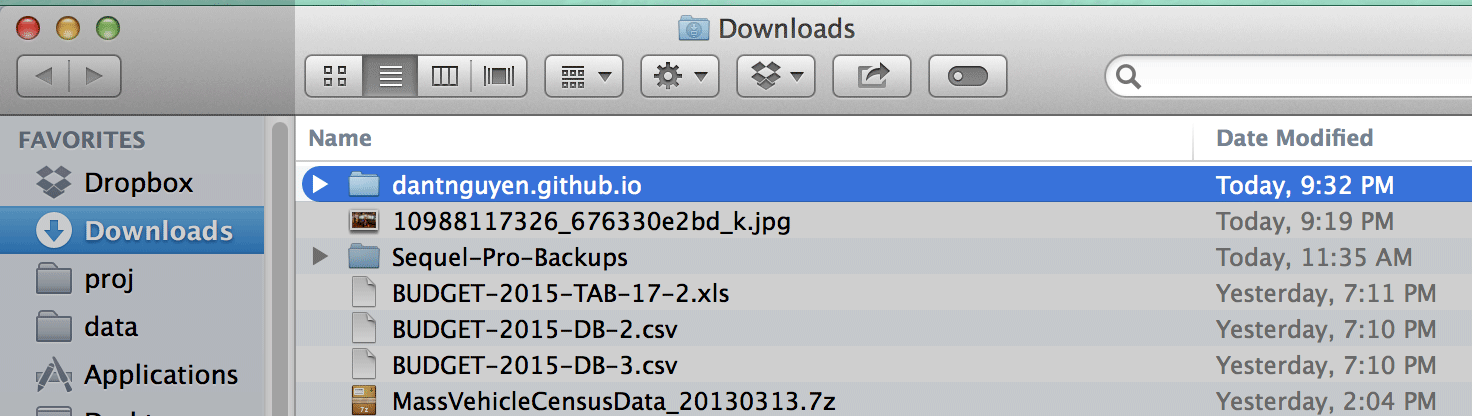
Find the zip file in your Downloads folder
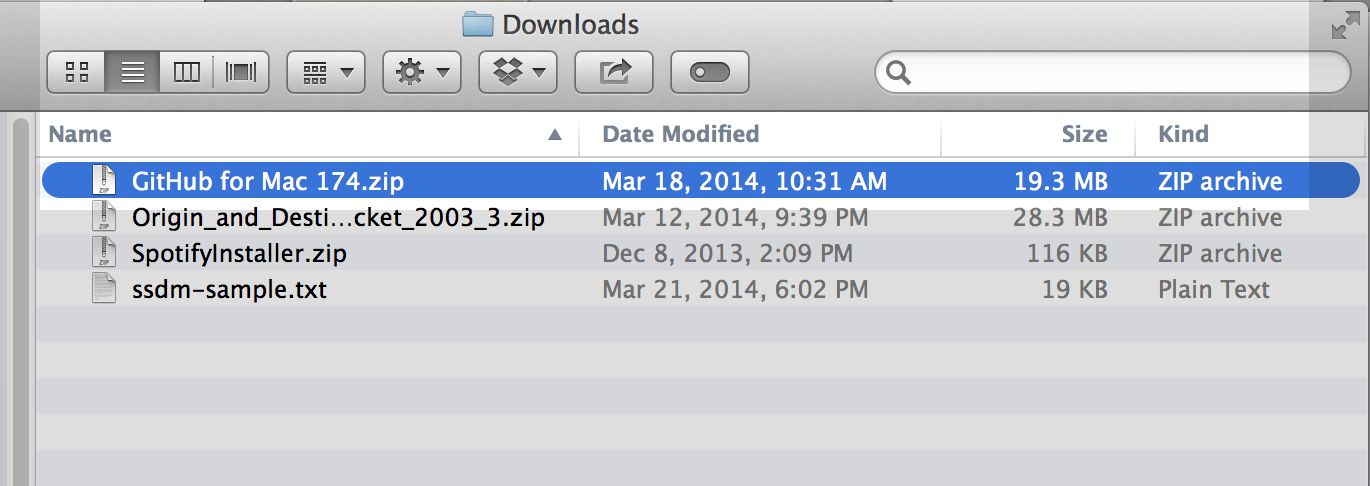
Double-click on the zip file which will produce a Github.app file. You can move this file to your Applications folder, or just double-click it and the app will offer to move itself for you.
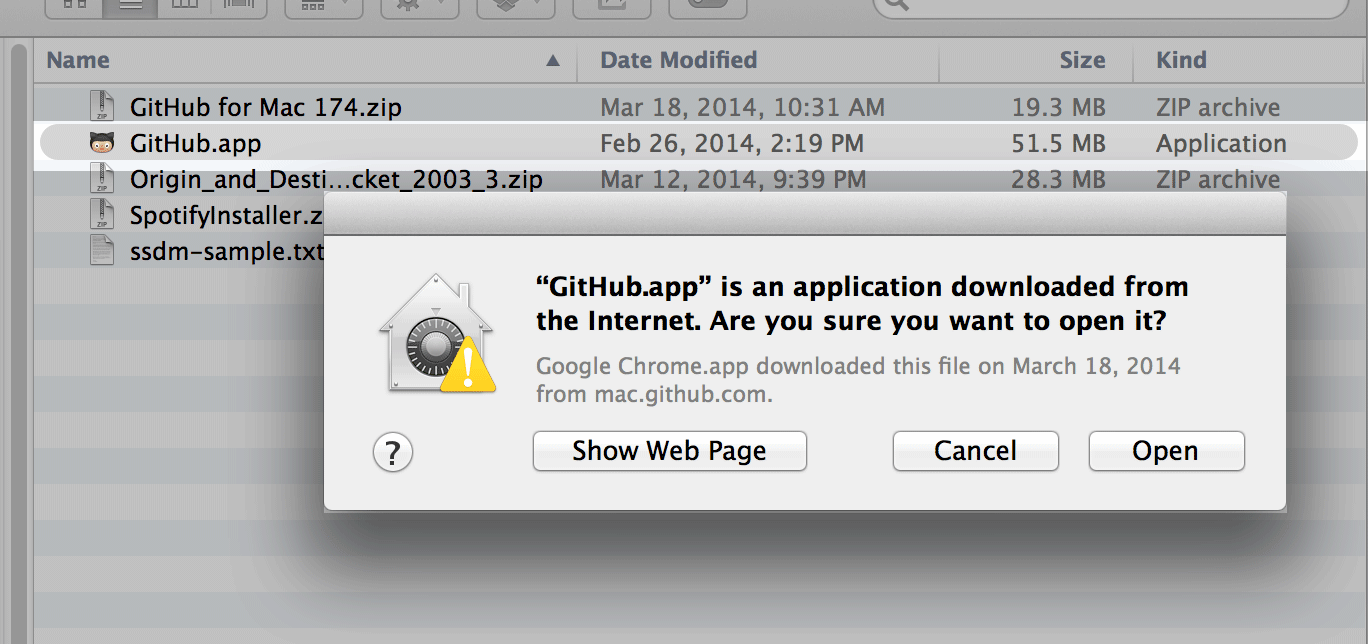
The app should ask you to sign with your Github credentials so that it can sync with your Github.com account.
Let’s get quickly acquainted with the Github Desktop App.
First look at the sidebar: you should see two subheads with (short) lists:
- THIS COMPUTER
- My Repositories
- GITHUB.COM
- username
Those two subheads represent the two physical locations where your Github repos might be stored: on Github.com (which you’ve been working with so far, via web browser) and on your own computer.
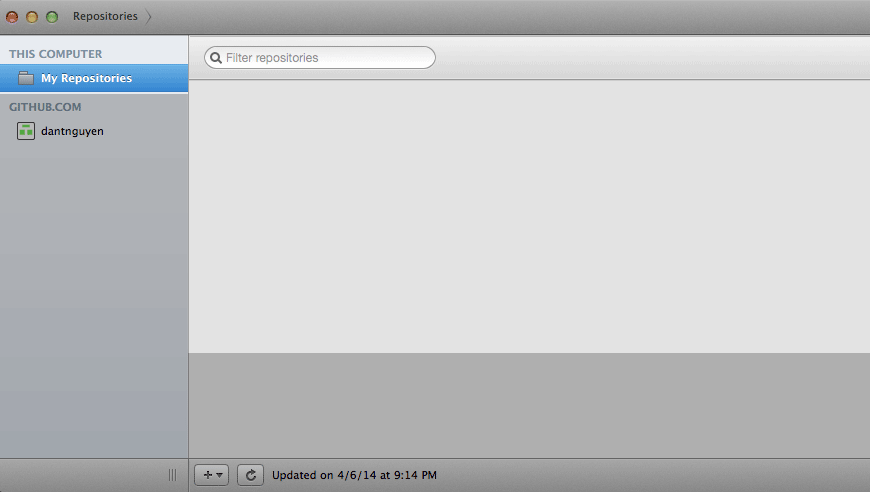
If you click on the My Repositories item, under the THIS COMPUTER subhead, you should see an empty screen. This is because you haven’t yet copied your Github repos to your computer yet.
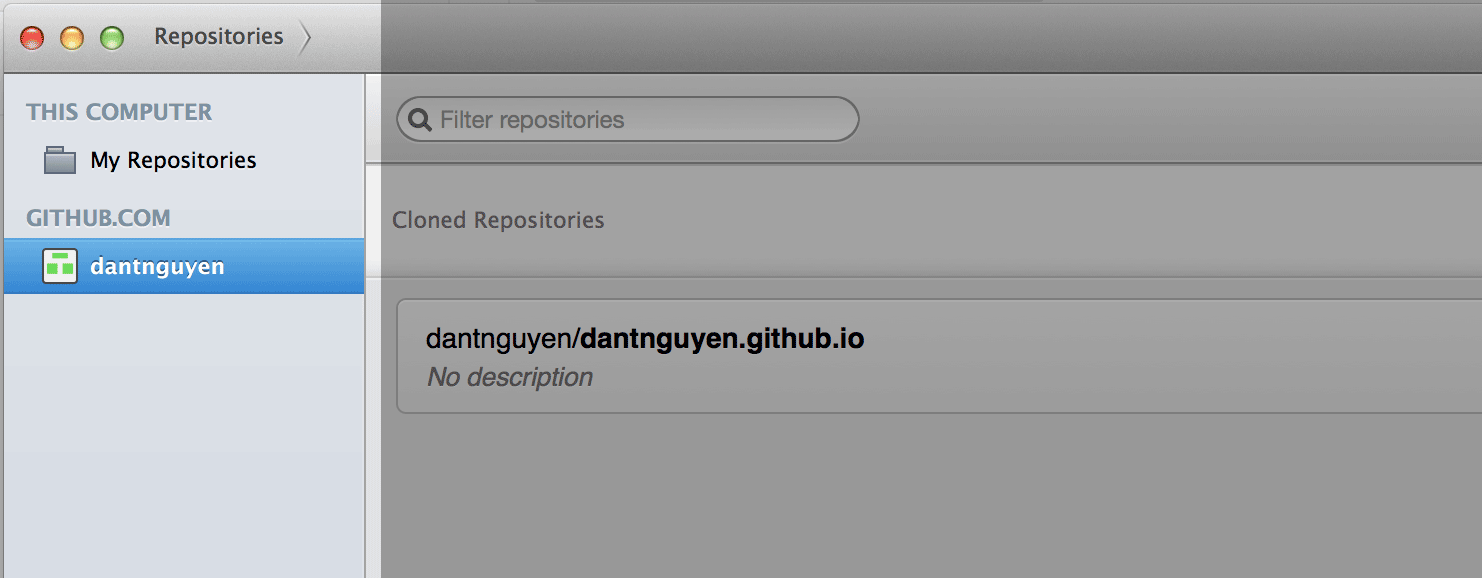
Now click on username under the GITHUB.COM subhead. You should see a lone repo:
username/username.github.io
This is the publish-to-Github-Pages repo you’ve been editing for the entirety of the lesson so far. As you create new repos on Github.com, they will show up in this listing.
And as you clone those repos over to your local computer, you’ll see a similar list under THIS COMPUTER » My Repositories.
Let’s now create our first cloned repo.
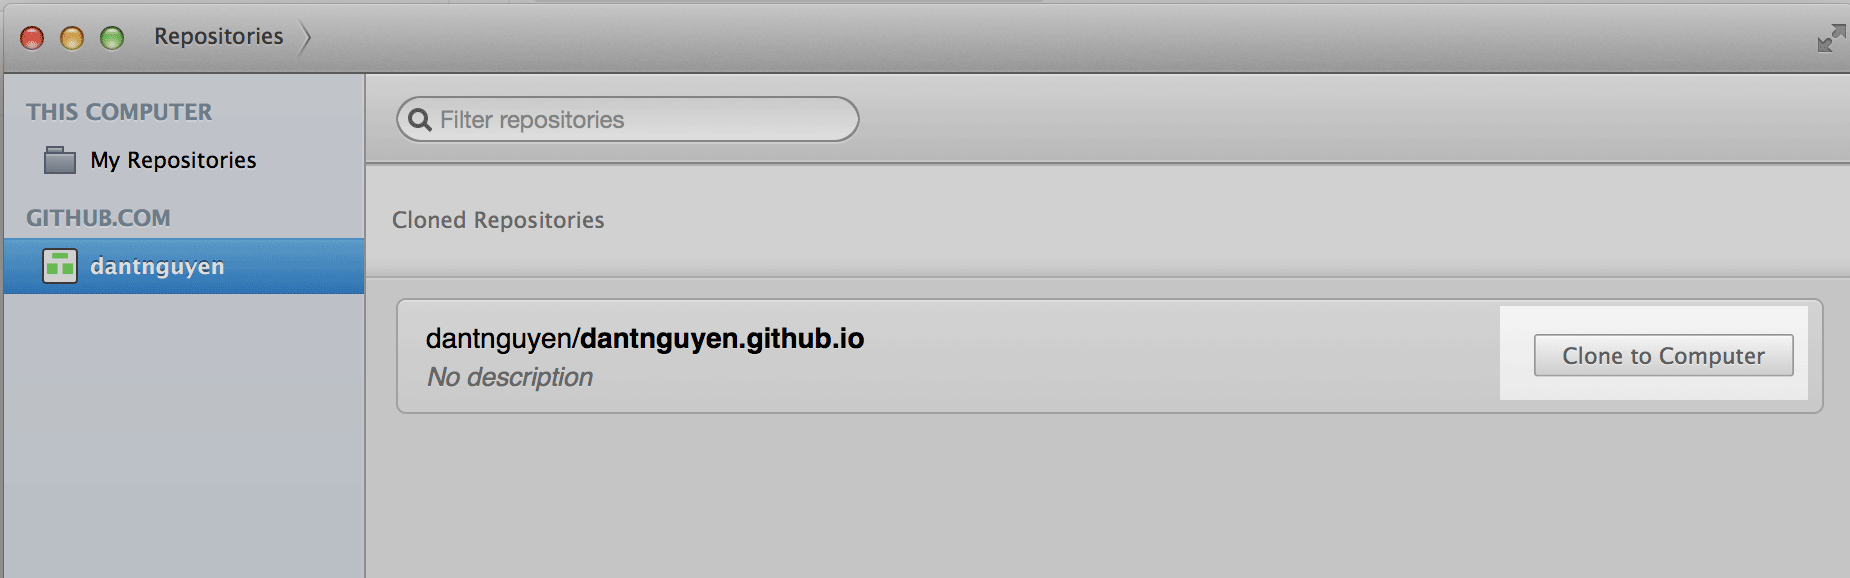
Clone a repo
A little Git terminology: the term clone refers to a git function that makes an entirely new copy of a repo. At the most basic level, this is no different than stashing a project folder on a USB drive or Dropbox and allowing collaborators to copy it onto their own computer.
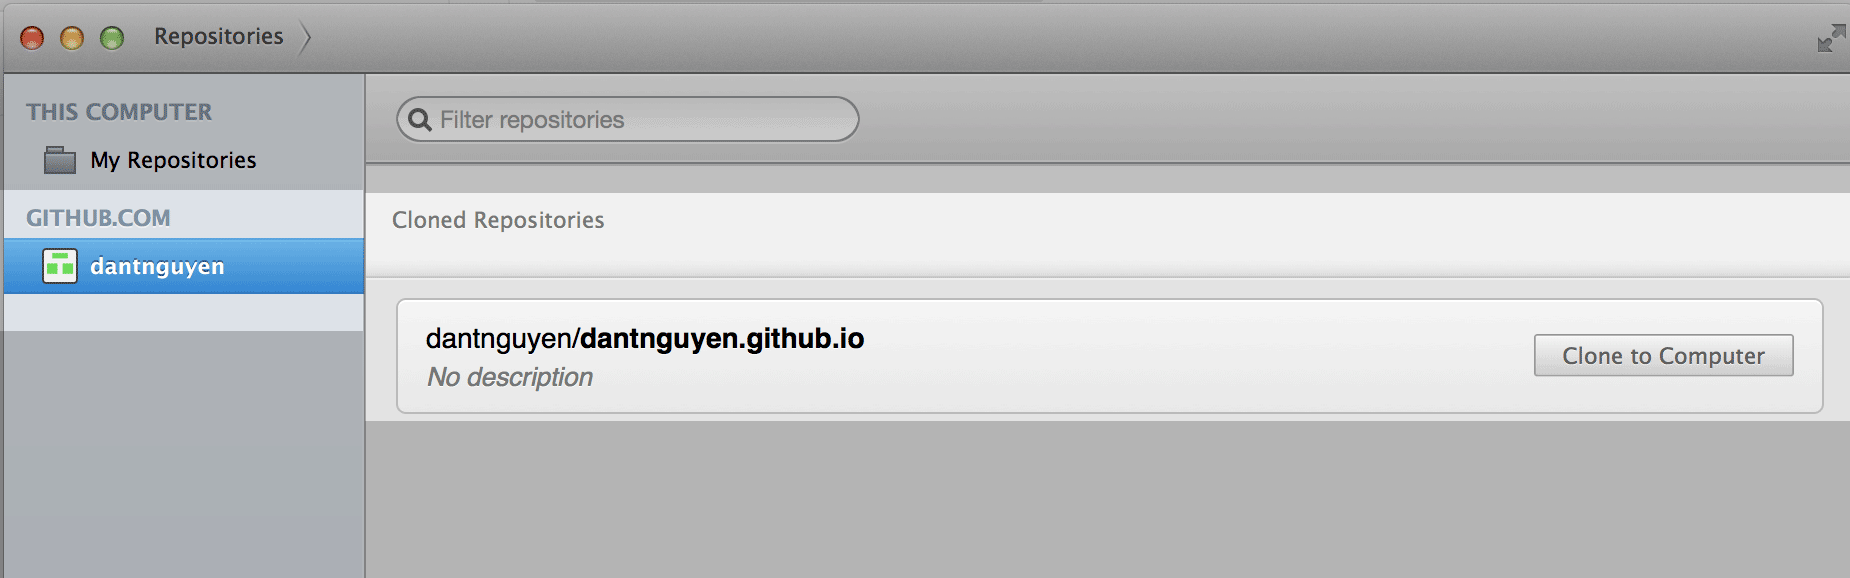
In the Github Desktop App sidebar, click the GITHUB.COM » username repo. In the right-side of the app, you should see a button that says Clone to Computer. Click it.
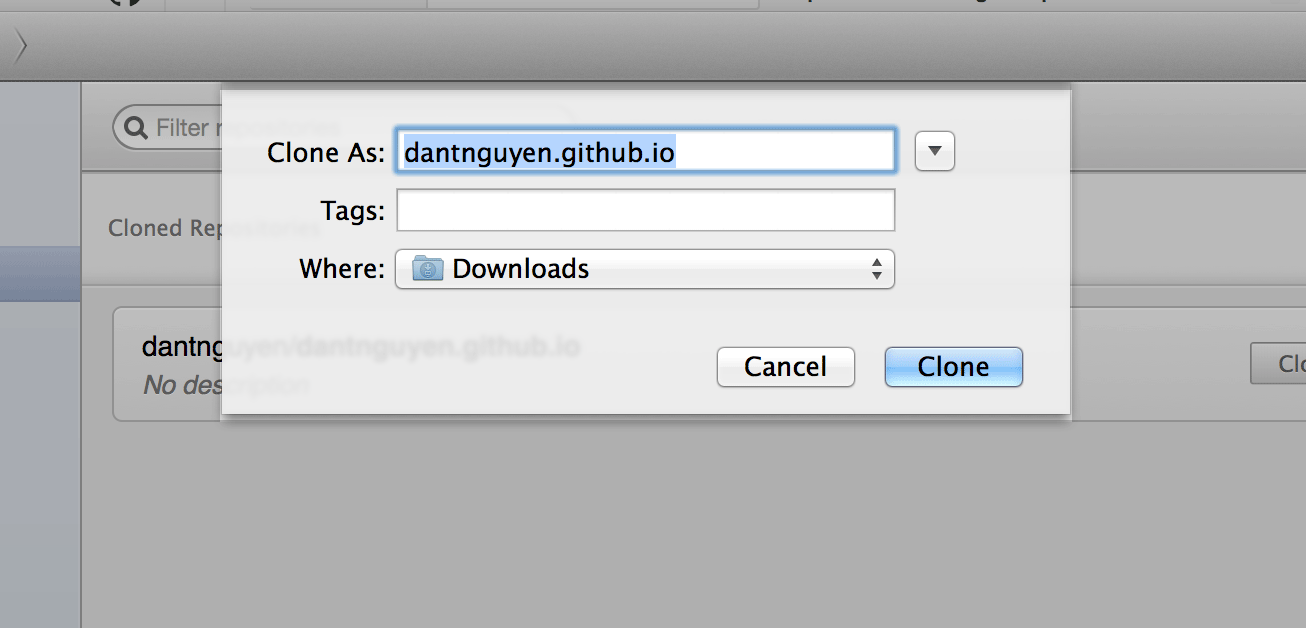
The app should pop-up a prompt asking you where to download the repo to. Again, cloning a repo from Github.com to your own computer is essentially the same as downloading a copy of it.
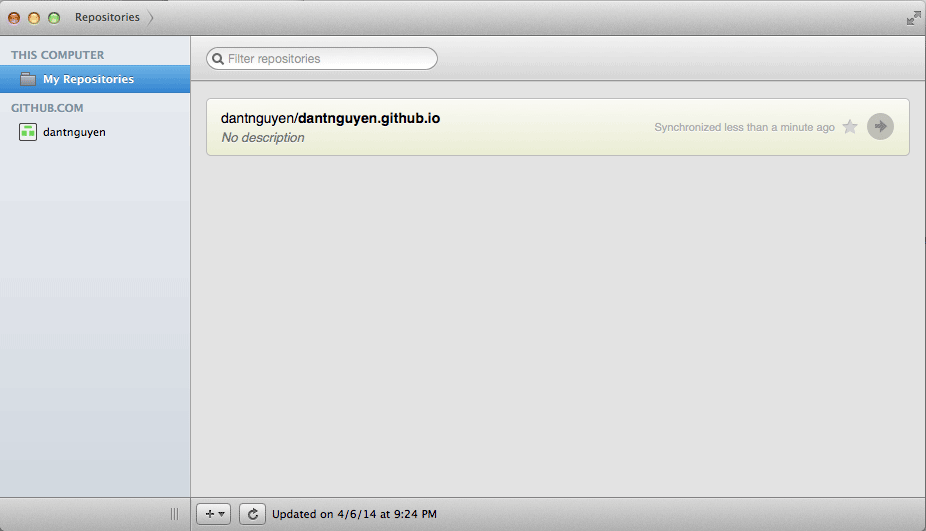
Now in the desktop app sidebar, click on the THIS COMPUTER » My Repositories list item. The right-side of the destkop app should now have a single item: the username/username.github.io repo, with a message saying it was “Synchronized less than a minute ago”.
Right-click on the cloned repo item, which will bring up a pop-up menu.
If you select View on Github, it will take you to that repo’s top-level page on Github.com, which you’re familiar with by now.
If you select Remove, it will delete the repository from your computer but will leave alone the copy on Github.com. Deleting a clone doesn’t delete the master copy.
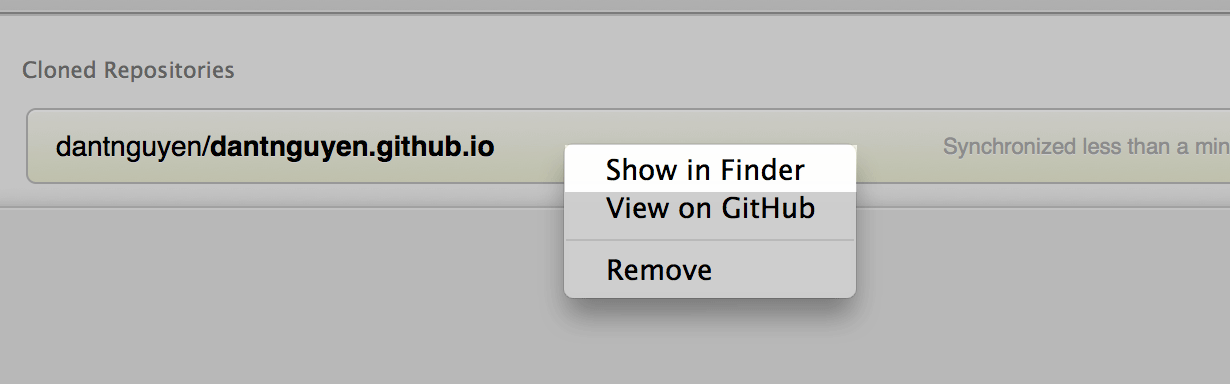
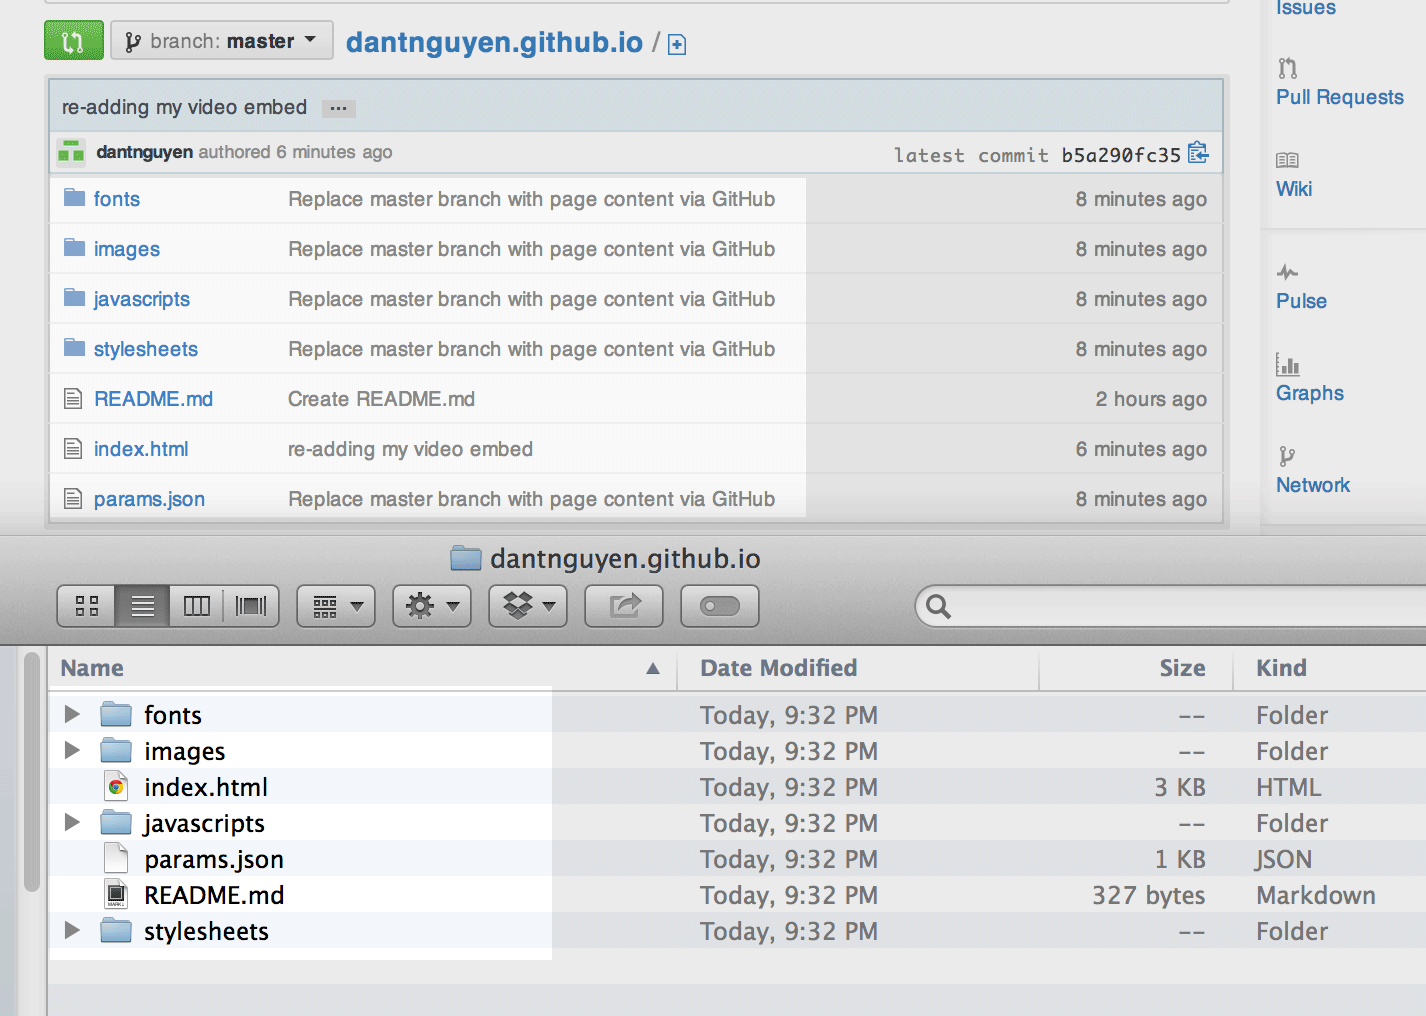
For now, select Show in Finder, which should take you to where you told the Github app to clone the repo.
Your repo should have been downloaded to a folder named: username.github.io
Double-click your repo folder. Does that file listing look familiar? Visit your repo folder at Github.com if you need to refresh your memory. See, a Git repo is very much like a typical folder of files.
The takeaway here is that Github.com can be seen, for our purposes, as a website that stores a copy of our project and allows us to peruse it via a web browser. But at any time, we can make an exact copy of the repo and distribute our files as we please.
Viewing the Git activity
Of course, a Git repo has a few additional features to it. There’s a (hidden) metadata file that lists, among other things, the repo’s configuration settings and history. In the desktop app’s My Repositories listing, either double-click your cloned-repo item, or click the little arrow button that’s at the right end of the listing.
The Github Desktop App will now focus on the cloned repo: the left sidebar will change to fit this context with a set of new buttons.
Notice the top-navigation: when you want to go back to the top-level list of repositories, simply click on Repositories.
![]()
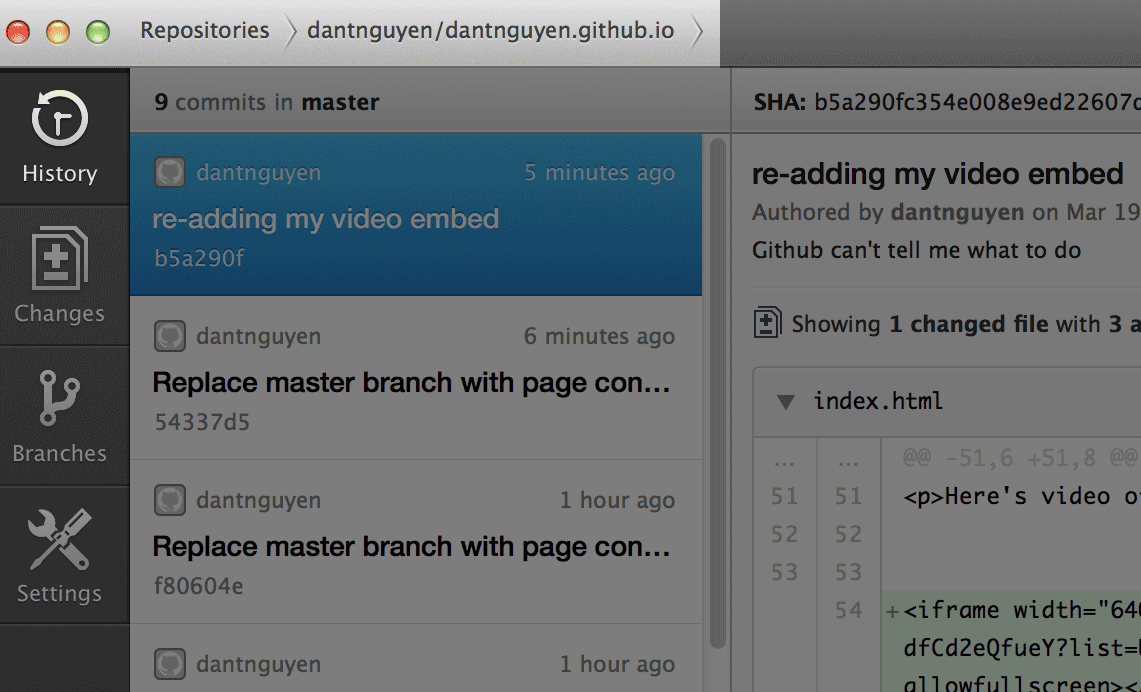
Part of cloning a repo is you also clone the git activity, i.e. the history of changes so far.
That commit history and the messages should look familiar to you.
Making changes to our local repo
Visit your cloned repo folder wherever you downloaded it.
Go ahead and click through the files. The images should open in your native image editor, text files in your text editor, and so forth.
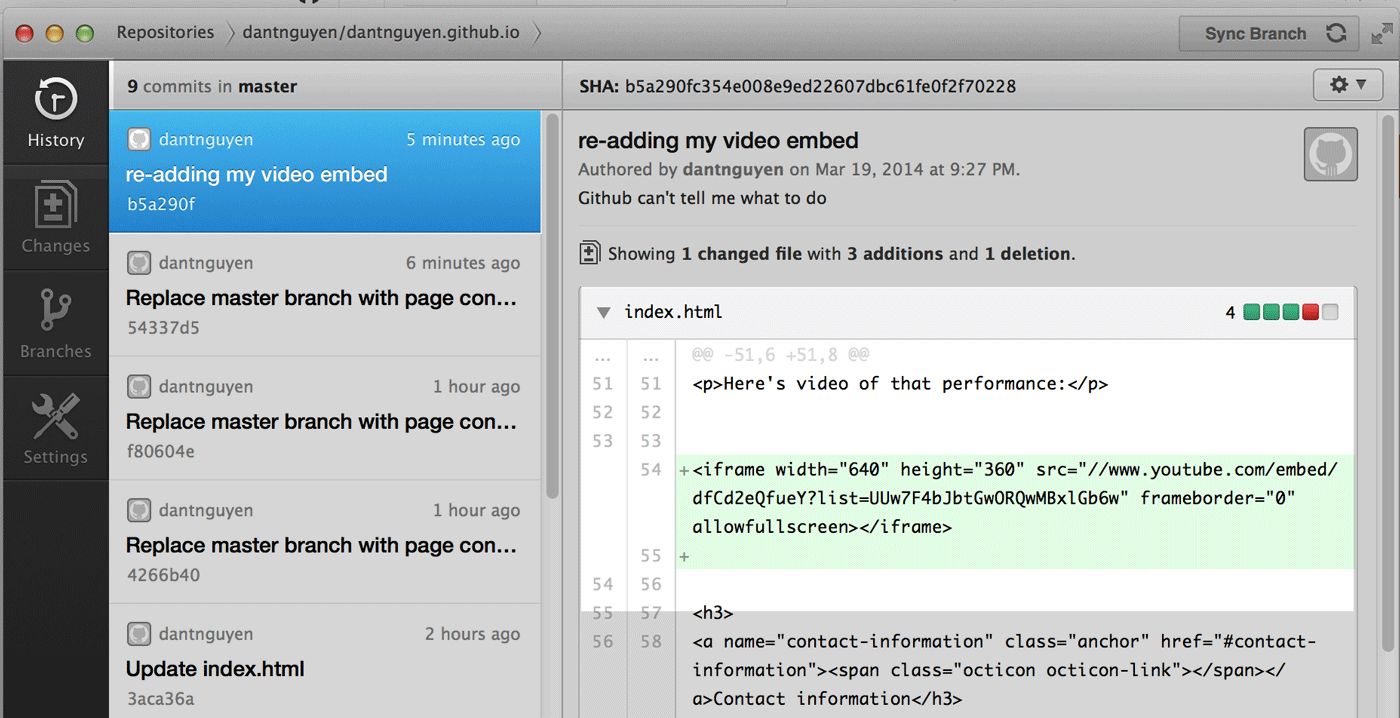
I’ve chosen to open the index.html file in my own text-editor (Sublime Text, which you can try for free) to change the YouTube embed code.
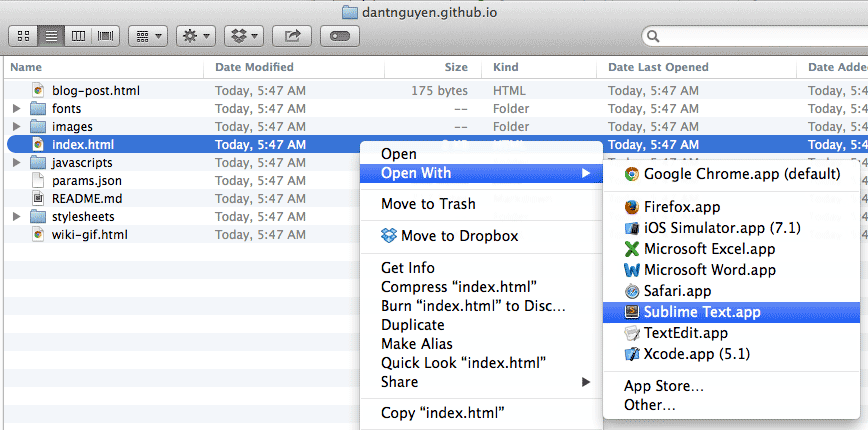
In my example, I’m removing the current YouTube <iframe> embed code and replacing it with this one:
<iframe width="560" height="315" src="//www.youtube.com/embed/zVTwUVHefgM" frameborder="0" allowfullscreen></iframe>
Editing our local, cloned index.html and saving it with our own text editor is no different than just editing index.html (and README.md) in the web browser, as we’ve done previously.
Except that the file is only updated on our computer. Again, we’re working on a clone of the project repo, which now exists independently of the copy on Github.com. Just as if you gave a haircut to an identical (human) twin, the hair on the other twin doesn’t automatically update, so do our file changes not automatically propogate to all the other cloned repos.

So the upshot is we can make changes to our cloned repo without screwing up work that we’ve stored on Github.com. However, the repo on Github.com is the one that gets published via Github Pages.
And if we want our local changes to make it online, we need to sync our local repo with the Github.com repo.
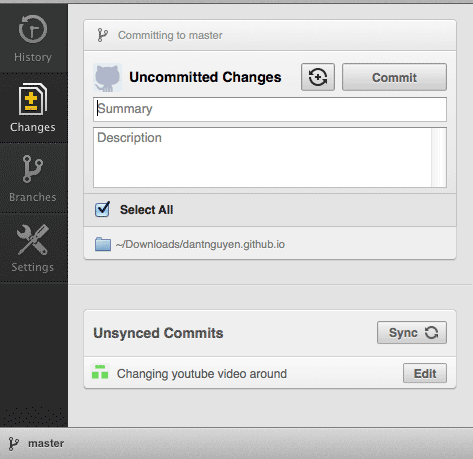
The first step is to commit our changes. Click the Changes tab (in the Github app’s side-menu). Since I edited my index.html, this screen shows me that I have changes to index.html to commit. On the right-hand side, the Github app shows me the diff of index.html, that is, what I’ve cut out (in red) and what I’ve added (in green)
Each time you make changes to your local repo, the Github desktop app (which continuously monitors that file folder) will update and show the changes. Try it out for yourself by making small changes to the other text files.
Then enter a commit message and press the Commit button.

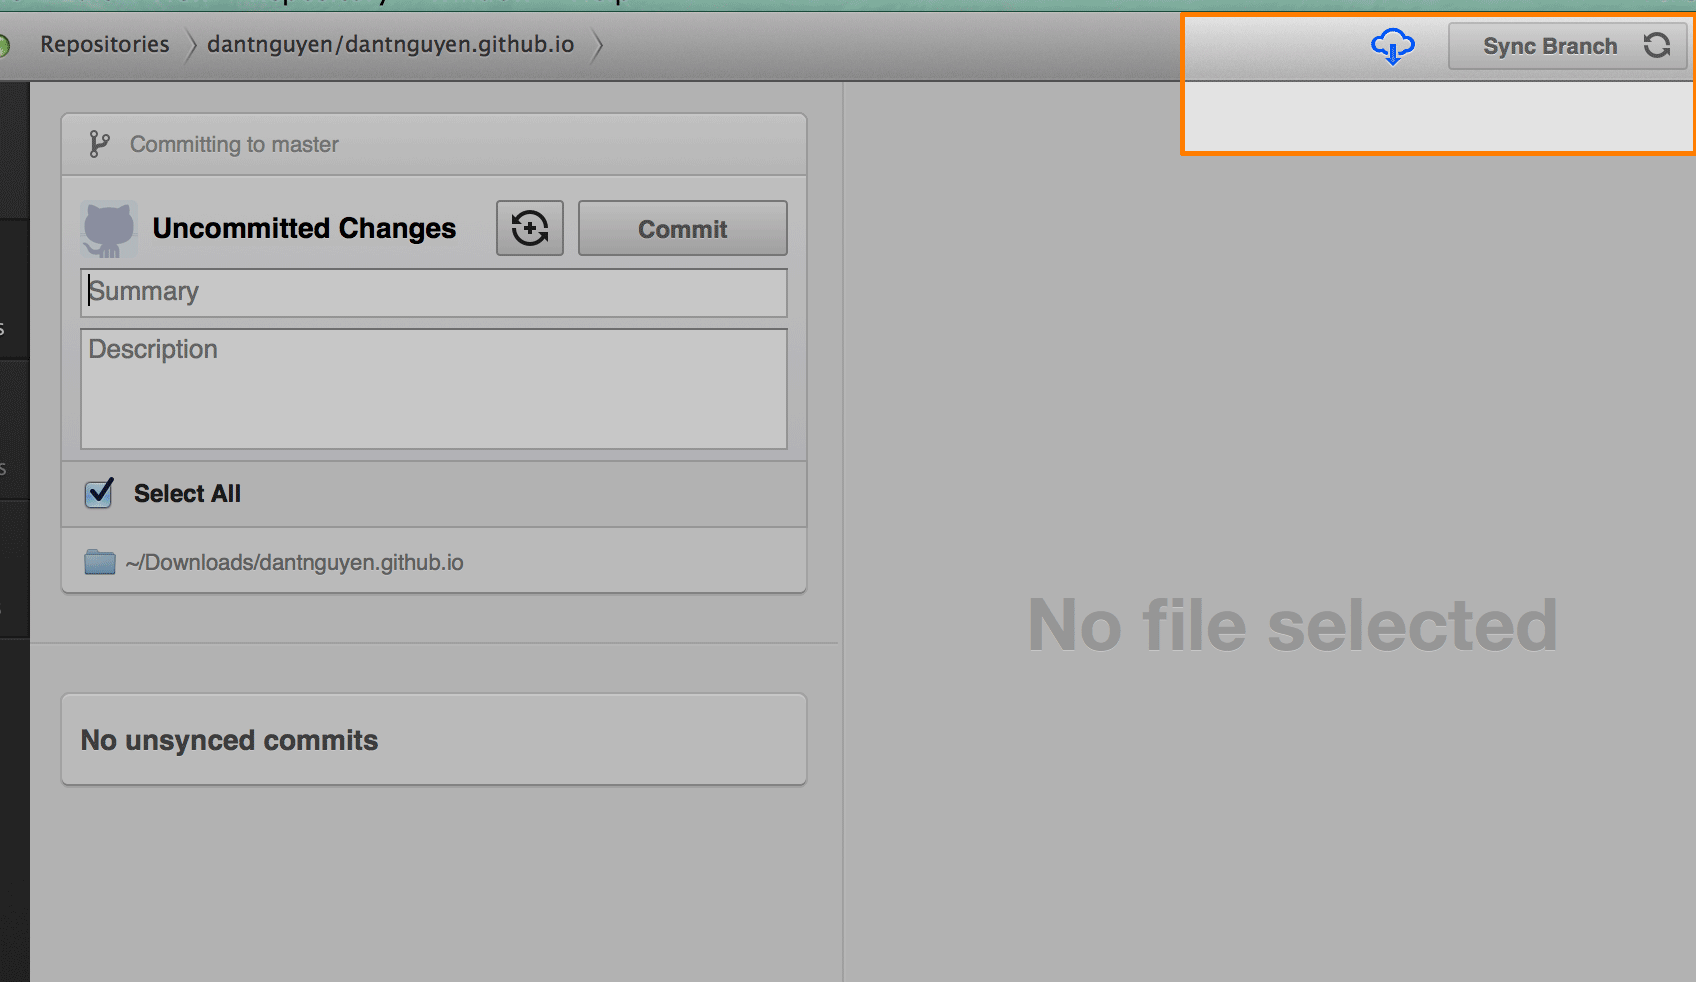
Syncing with Github.com
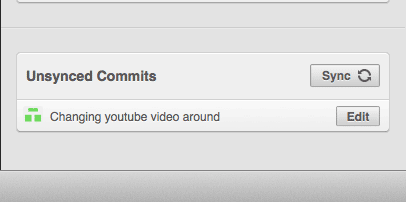
The left side of the desktop app will update to reflect that you’ve committed a new change (or set of changes). Notice that under Unsynced Commits, there’s an item with the commit message (“Changing youtube video around”), as well as a Sync button.
The word Unsynced is a clue that our local changes have not yet affected what’s on Github.com.
A review of Git terminology: when we edited files on Github.com and pressed Commit, we saw the changes saved and reflected online immediately.
But with Git, the commit command merely means that we’re recording a snapshot of our repo as it currently exists.
This is not the same as saving a file, like as you’re used to in your word processor or image editor. That action saves a snapshot of the file. But in the context of a Git repo, the repo doesn’t consider that saved file as part of the repo’s current snapshot until you hit commit.
Inside Github.com’s file editor, though, when you hit Commit, it does the saving of the file, the snapshotting of the repo, and then, if the repo is connected to Github Pages, the re-publishing of the file. But that’s unique to how Github.com handles repo.
Now that we’re working off of a local repo, on our computer, we need to take an extra step to say, “Now, make these local changes appear on Github.com.”
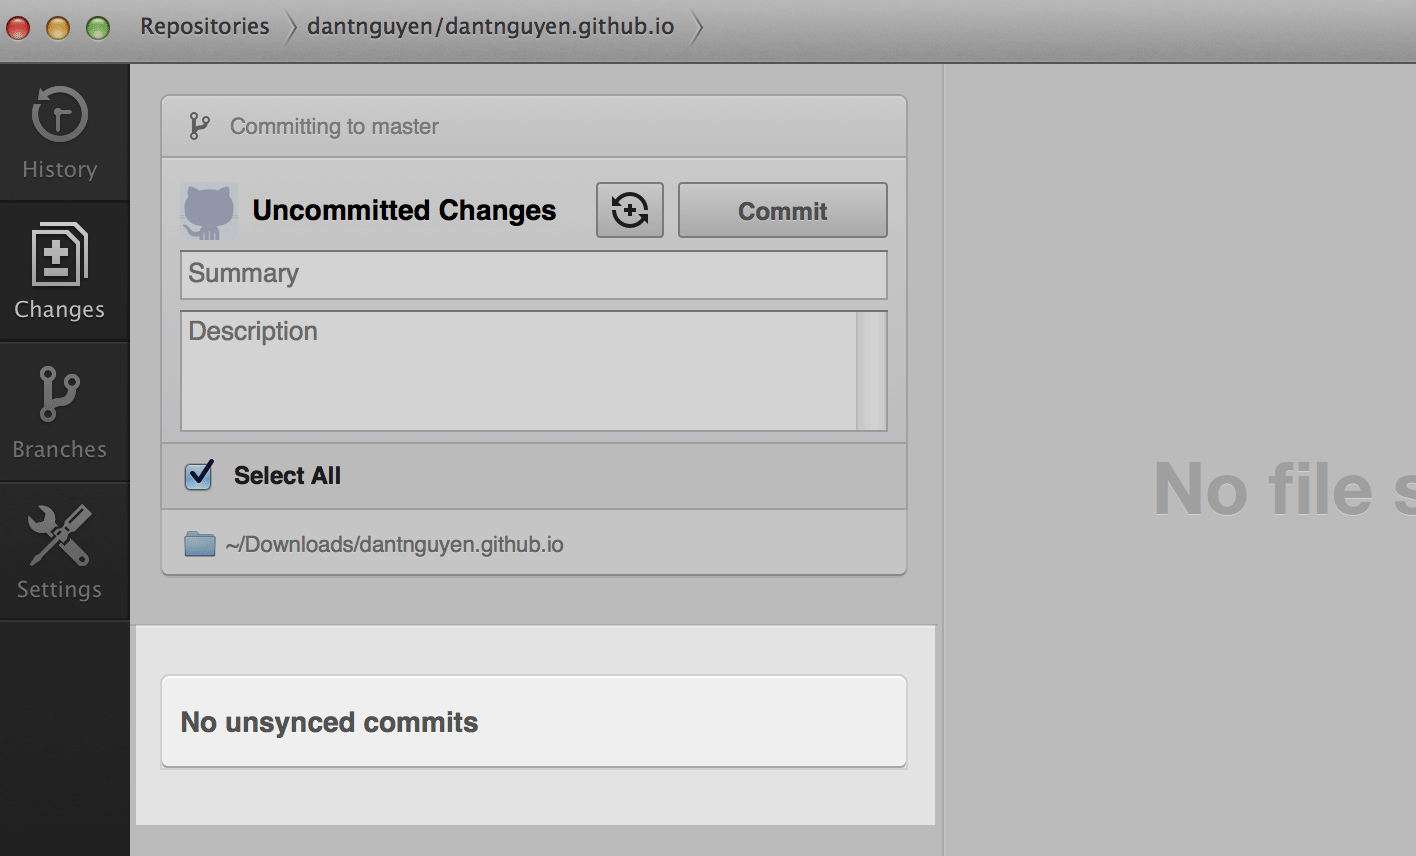
We make this happen by pressing the Sync button that has shown up in the Github desktop app.
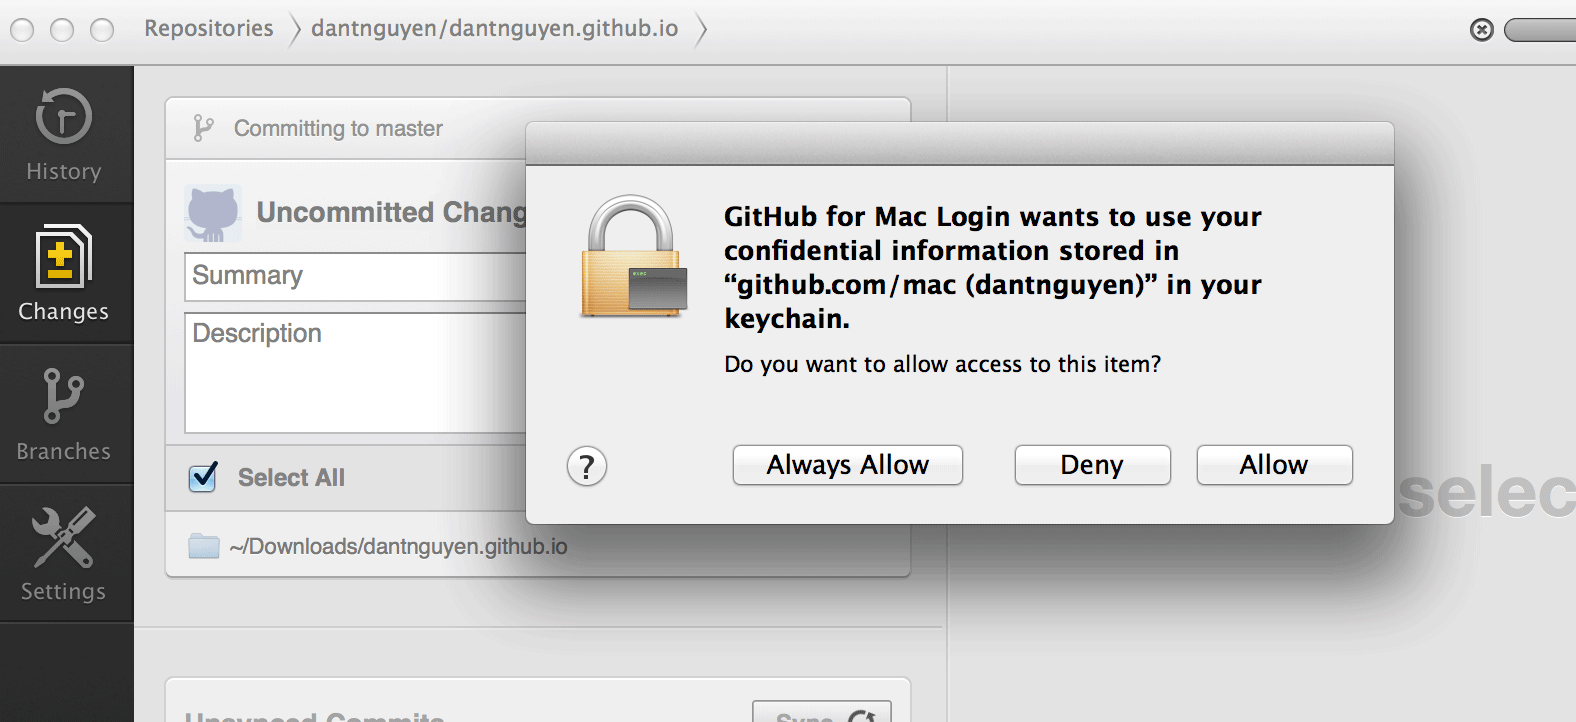
You may get a request from the Github app to use the credentials for your Github.com account. Allow (or Always Allow) the Github app the access it needs.
After a few seconds, you’ll see that the sections for Uncommitted Changes and Unsynced Commits are now empty, indicating that the sync action has finished.
In the Github app, check out the History tab, which will now list the latest commit.

Now visit your Github.com repo page which will also show the synced files. In my case, the only file I changed was index.html

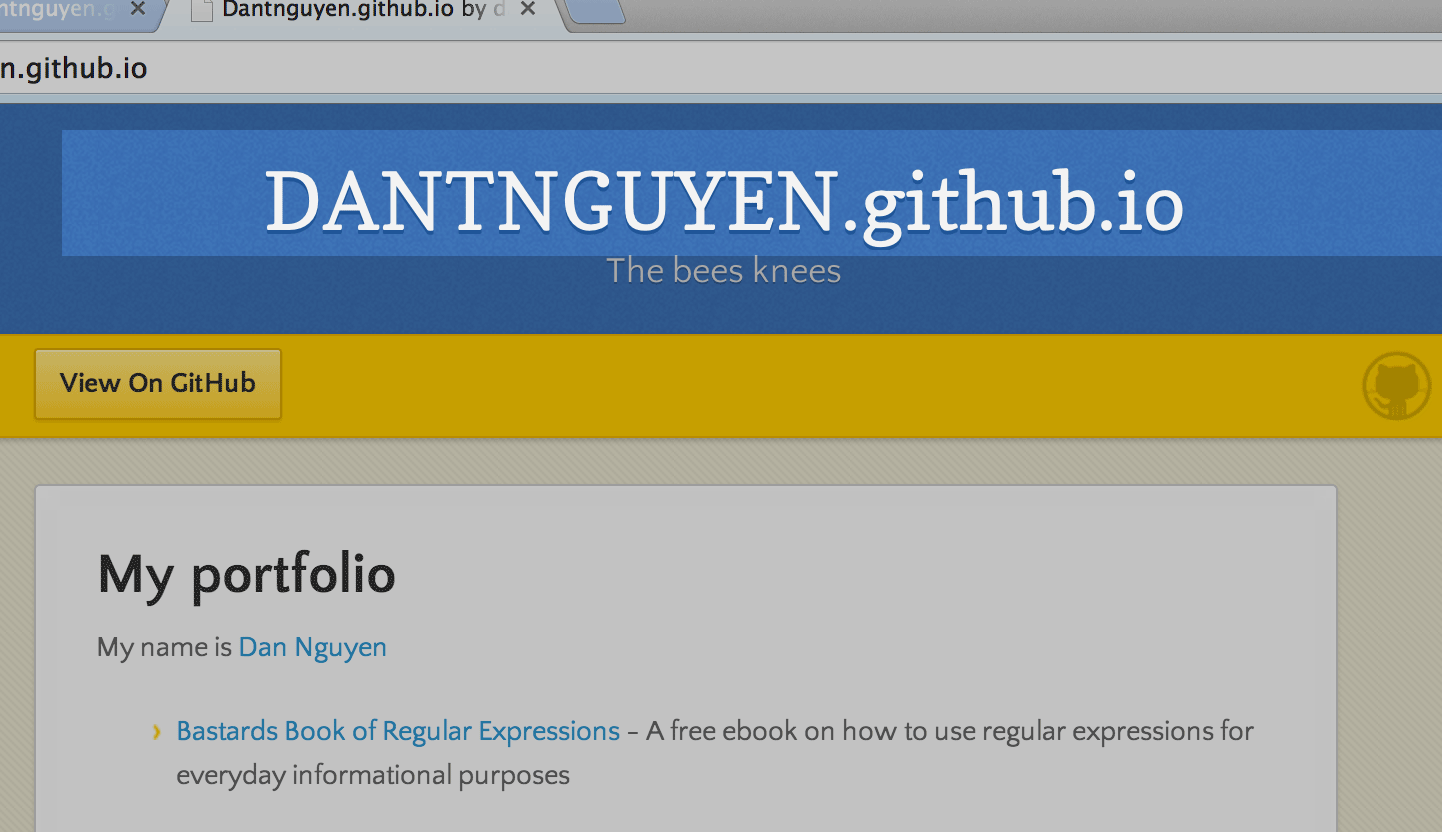
Finally, visit your home on Github Pages, e.g. http://username.github.io, to see the changes you’ve made to index.html
Uploading new files
So we actually haven’t done anything new by cloning our repo and using the Github desktop app: it’s essentially the same Edit-and-Commit routine, with an additional Sync to keep the clone and original repo in sync.
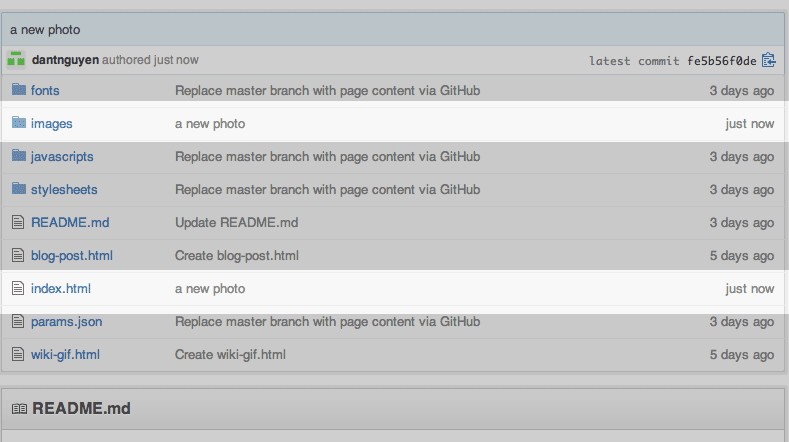
But now we’re working with our repo as if it were any other file folder on our system. Which means we can drag-and-drop files of any type into our repo folder. In this next exercise, we’ll add a new photo to our page.

First, download a photo from the Internet and save it as something like: my-photo.jpg in your Downloads folder.
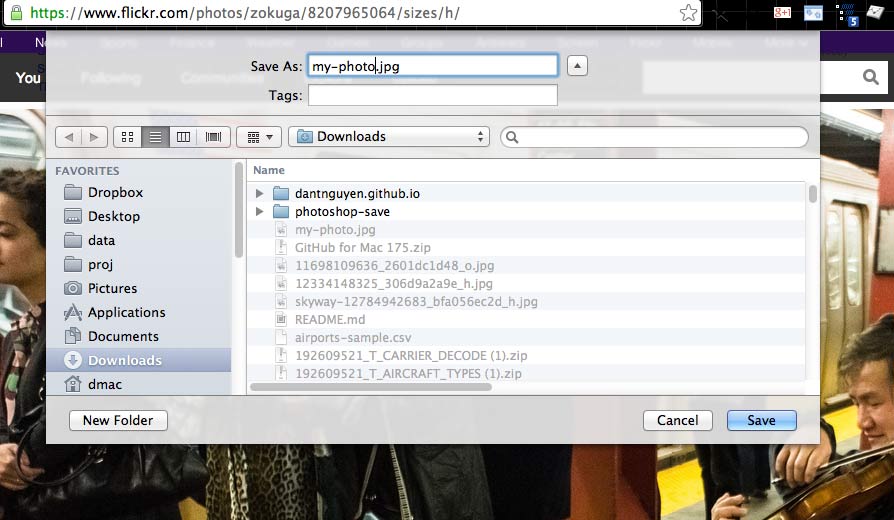
Then, drag-and-drop it into your local repo folder, under the images subdirectory (which you can create if it doesn’t already exist).

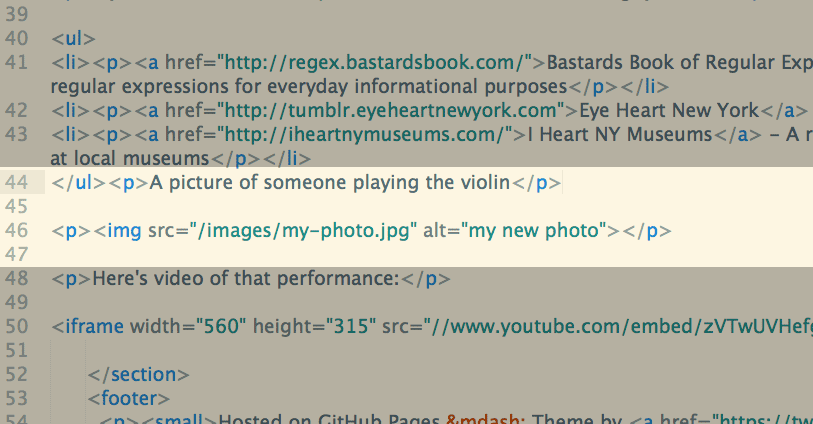
Now edit index.html in a text-editor. Find the existing <img> tag if you’re using my example code:
<p><img src="http://i.imgur.com/2i35DTo.jpg" alt="alt text"></p>
This code does show an image, which you can visit on the Web at http://i.imgur.com/2i35DTo.jpg. But what if the image’s server (i.imgur.com) goes down? Now that our new image, images/my-photo.jpg is inside our repo, we have control of it – though we are responsible for hosting it on our own server (in this case, Github Pages).
To have our index.html use our image file, we simply update the src attribute of the img tag:
<p><img src="/images/my-photo.jpg" alt="my new photo"></p>
Check out the Changes tab of the Github Desktop App. You should see under Uncommitted Changes, the new image file and a change to index.html.
Hit the Commit button, then Sync the files with Github.com.
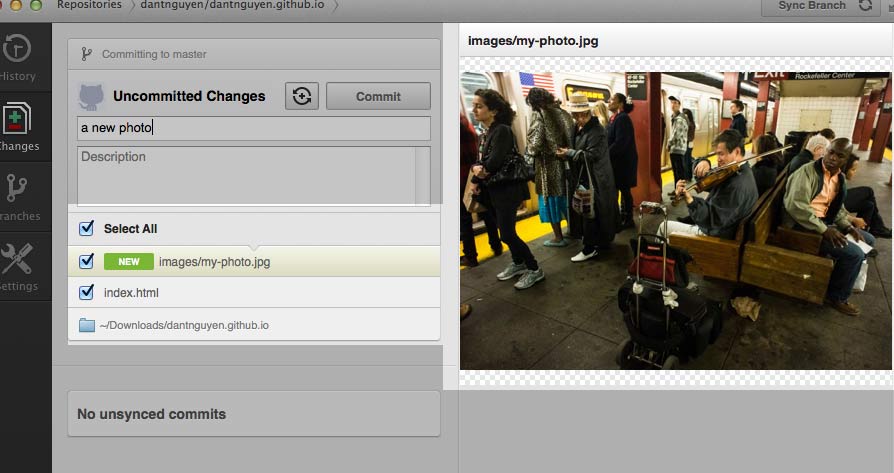
Check out your portfolio repo on Github.com. You should see the commit message on two different files (index.html and the images sub directory)
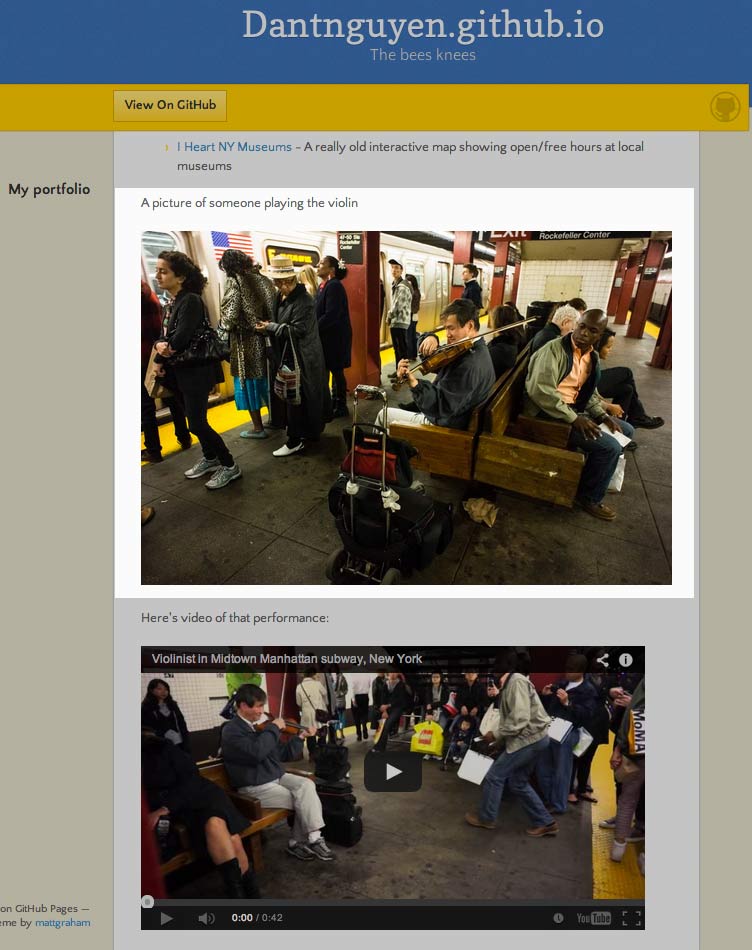
Finally, checkout your portfolio homepage at username.github.io to see the new photo.
Again, nothing substantially new, just a demonstration of how easy it is to add new files to our portfolio homepage. In the next chapters, we’ll be drag-and-dropping whole folders in and out of our repo.
Sync practice: online-to-offline
One more exercise before we end this lesson. We’ve seen how to we can sync changes from our local repo to our Github (i.e. remote) repo.
But can the sync happen in the other direction? That is, can we make changes to the Github repo, and then sync them with our local repo?
Let’s find out. Go back to your project repo page and click-through on your index.html. Then click the Edit button.
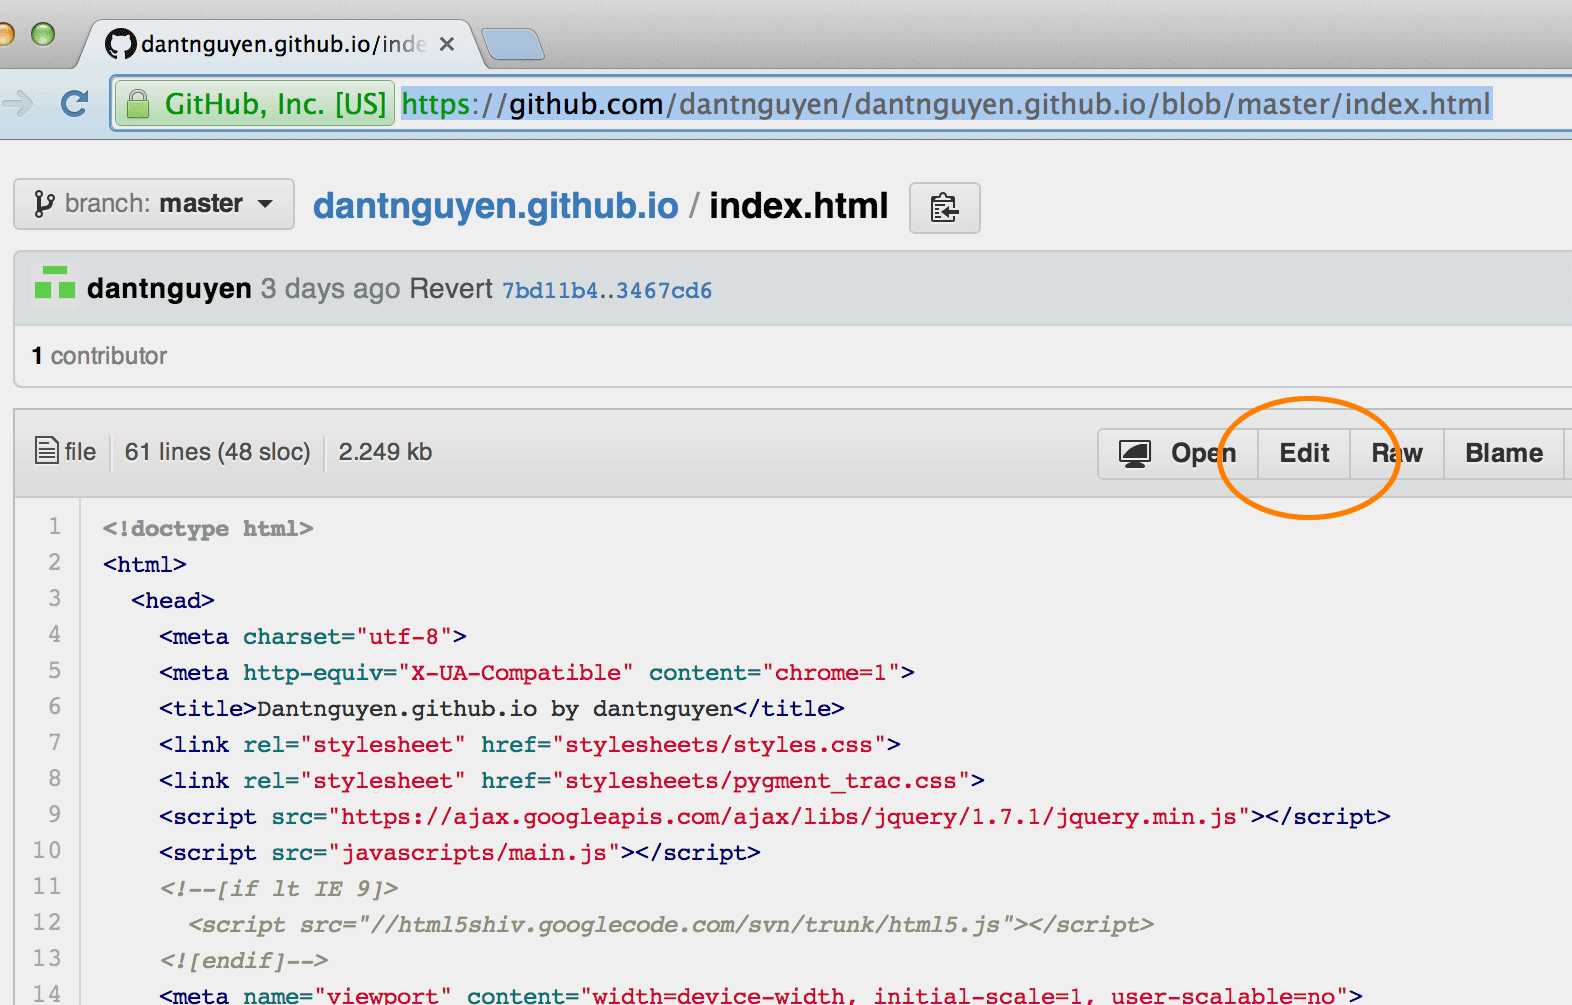
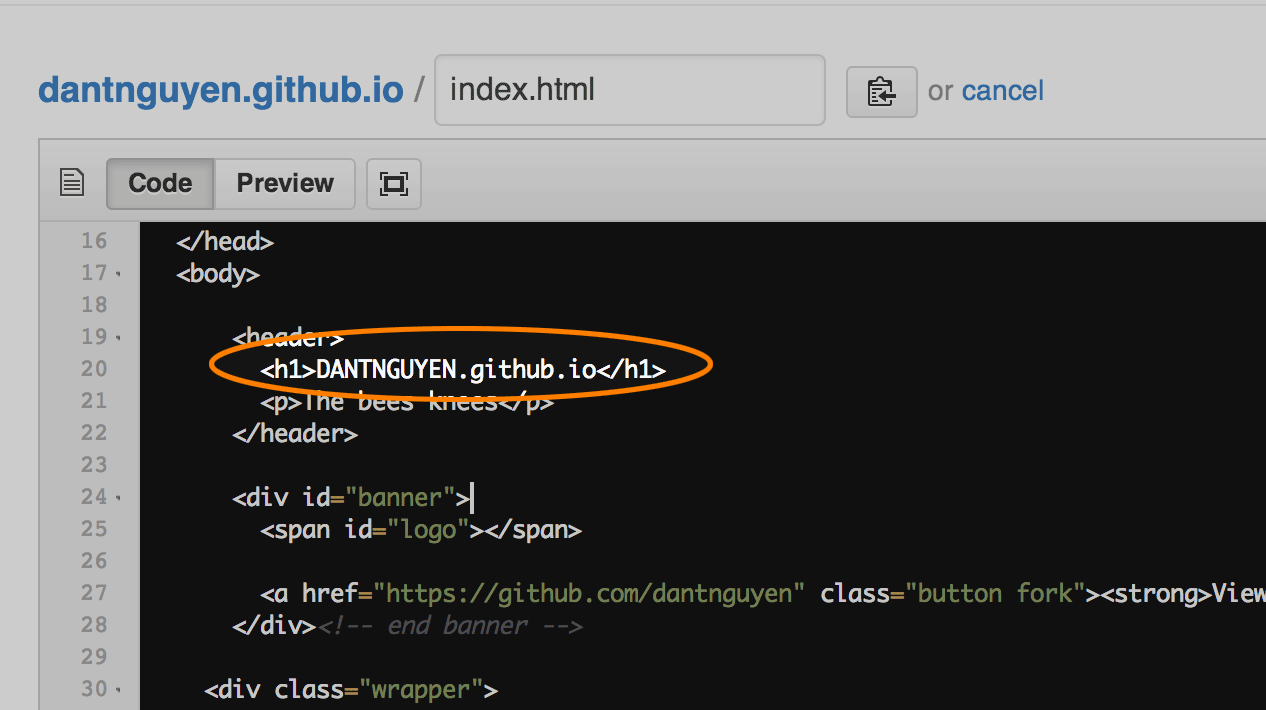
In the Github file editor, make a change you’ll notice. In my example, I’ve uppercased the page’s <h1> title. Then commit your change.
Your project repo page will show that index.html has recently been updated.
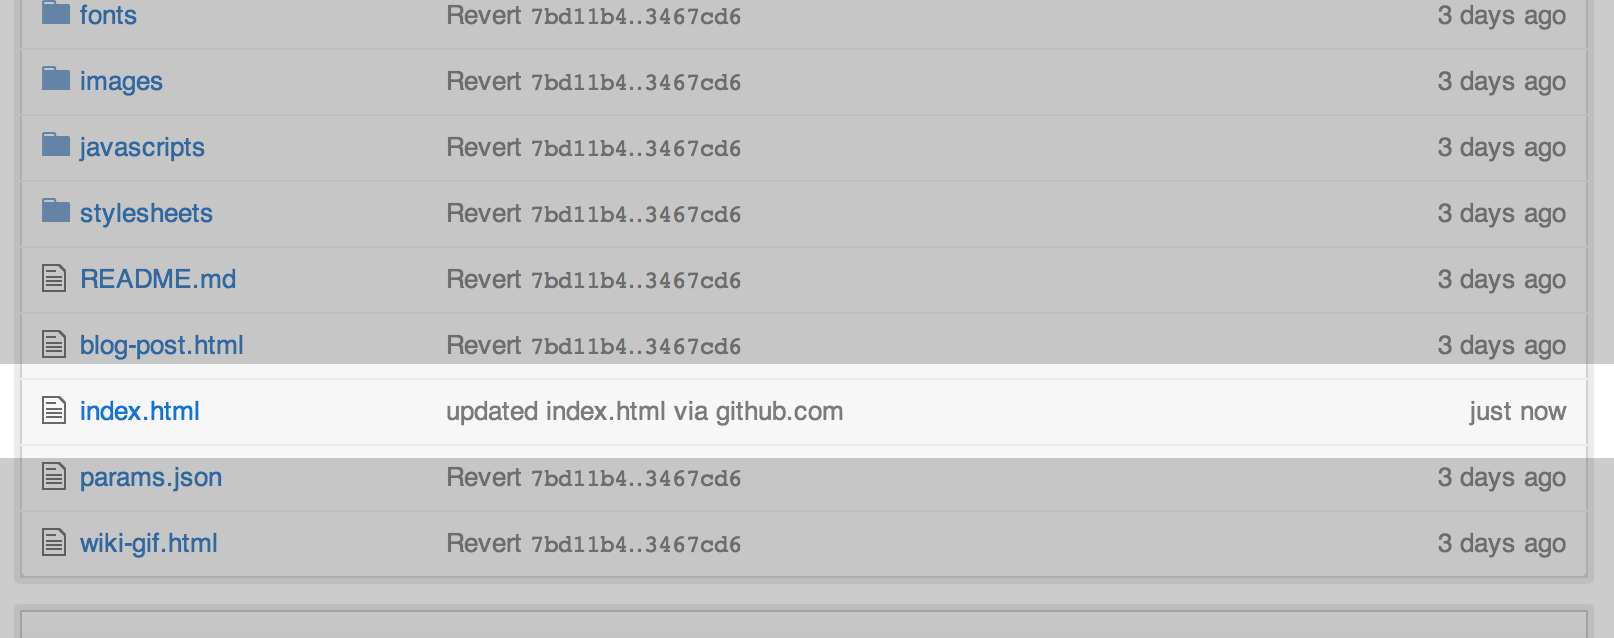
To visually confirm the edit, visit index.html to see how it was auto-published by Github Pages at: http://username.github.io
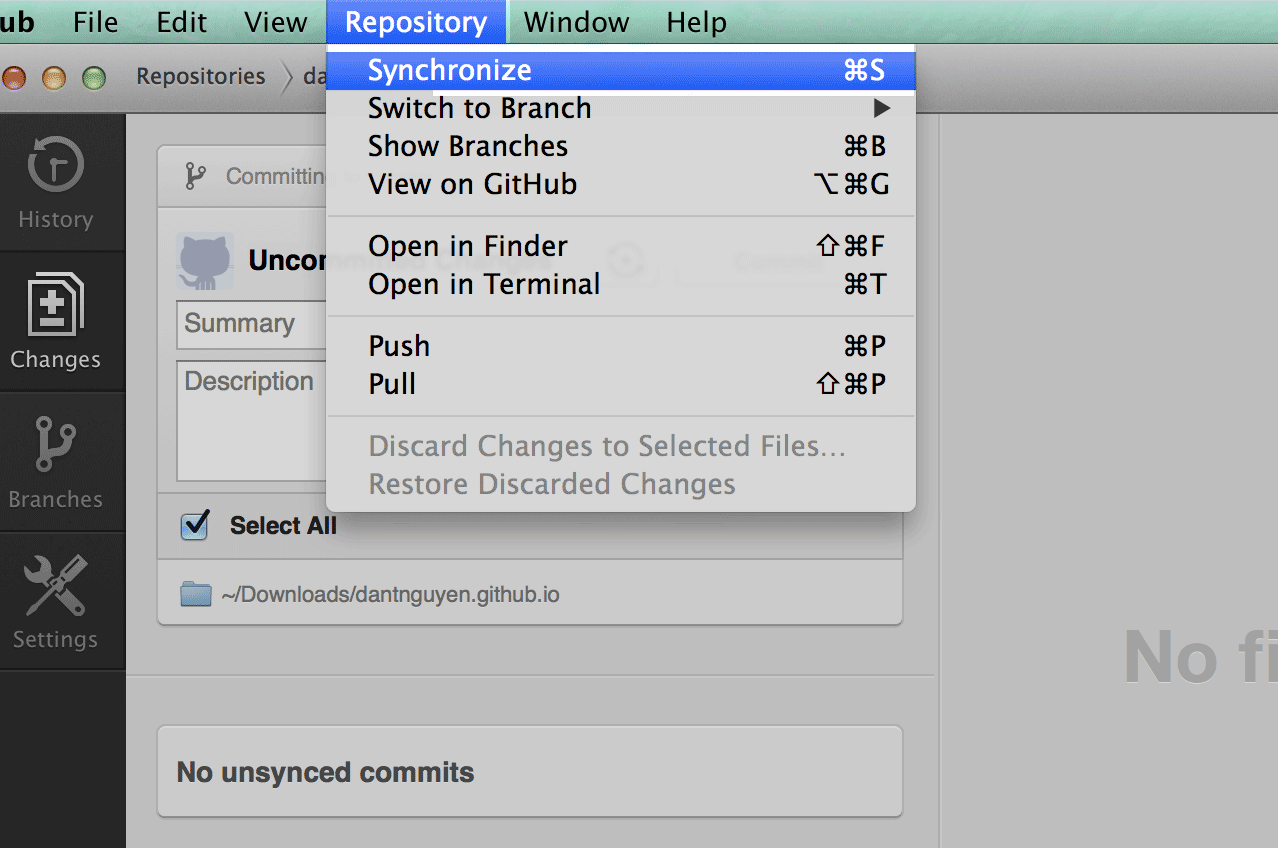
Now go back to the Github desktop app. Select your project repo. At the top-right of the top nav, you should see a Sync Branch button. Clicking this will sync your local repo to the just-updated repo on Github.com
Alternatively, you can click on Repository in the menu navigation and select the Synchronize action. (Or just hit Cmd-S if you’re on a Mac)
In the Github desktop app, click the History submenu. You’ll see that it has been updated to include the edit that was made on Github.com
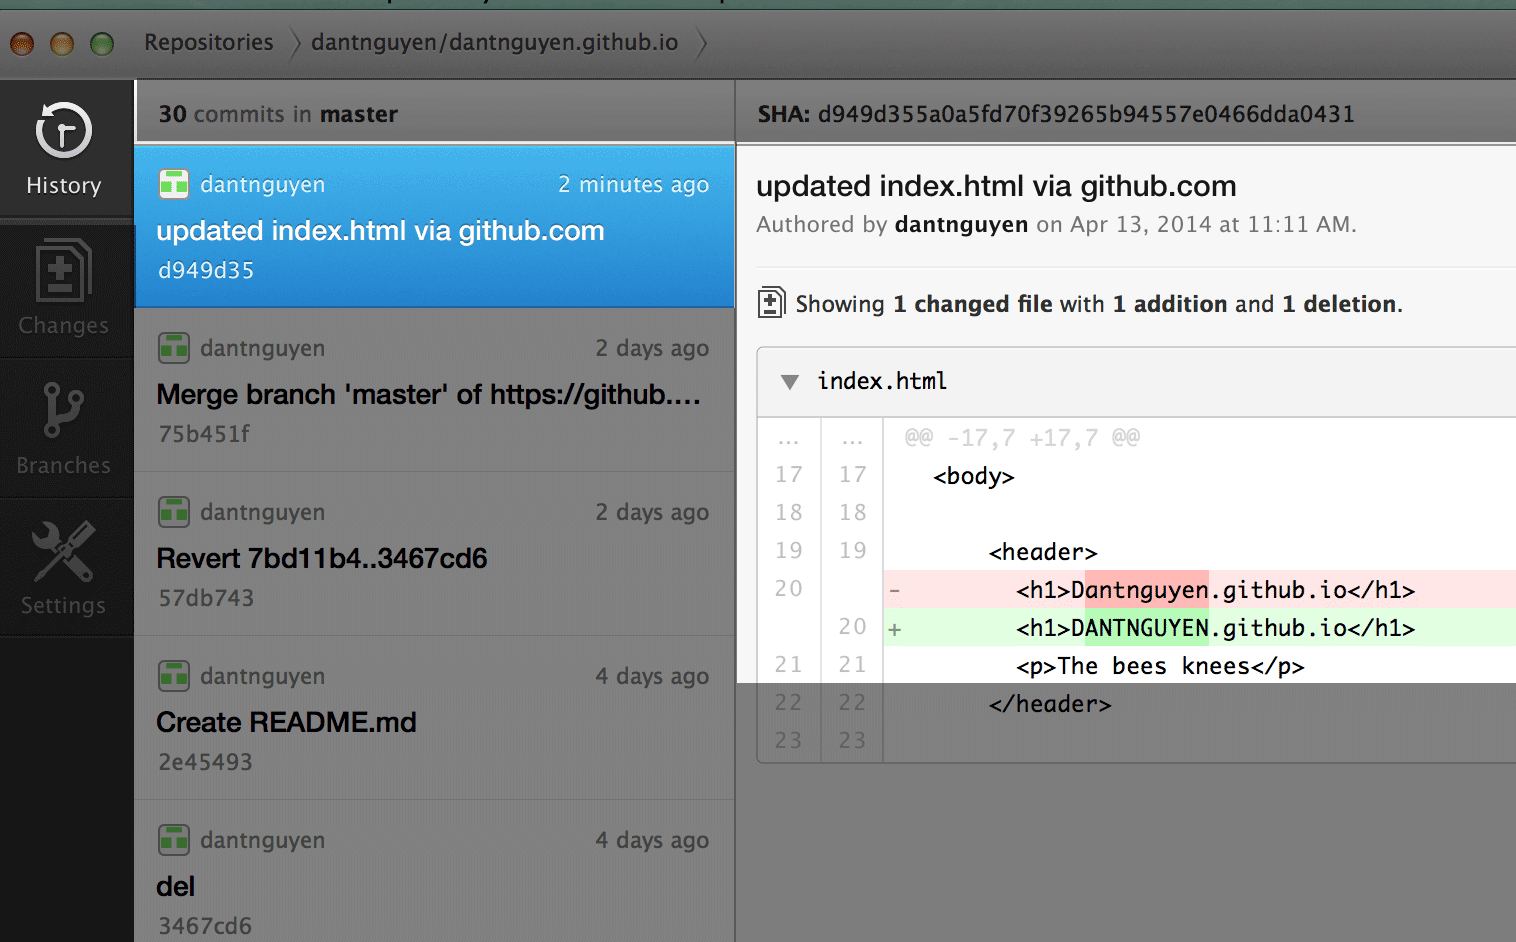
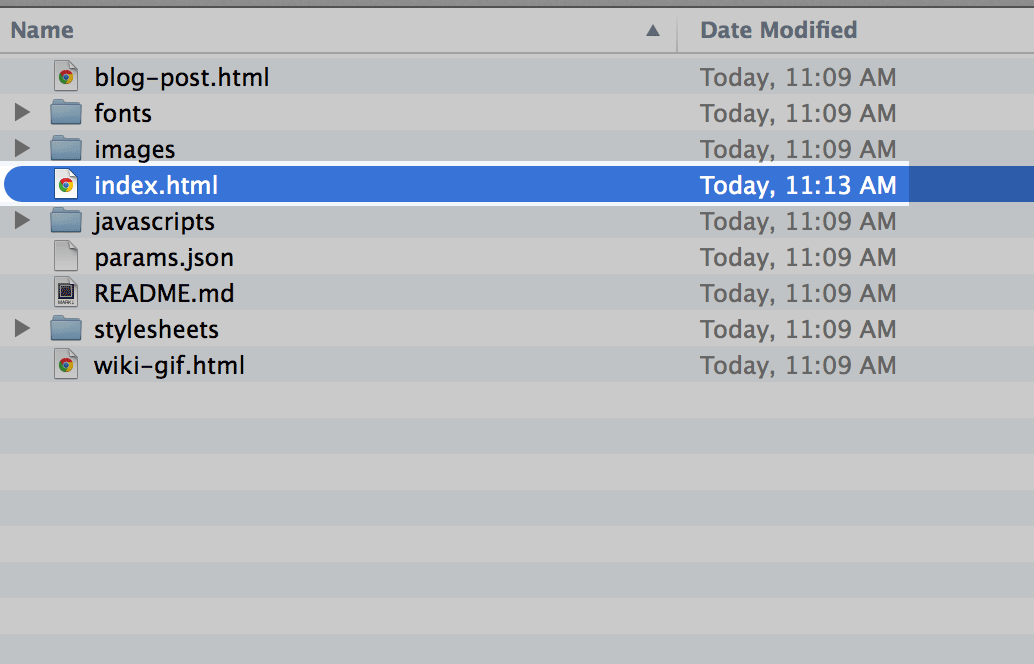
To confirm that the sync-action actually had effect, you can go to the file folder on your computer that contains the repo. Note that the index.html file should have a newer timestamp than the other files.
Not much new to understand here. We’ve just seen how both of the cloned repos – local and on Github.com – can independently make changes and sync with each other. However, it’s important to note that Github Pages will only publish from the repo on Github.com. So whatever changes you make locally needed to be pushed online if you want them seen on your live Github.io portfolio.page.
What happens when you’ve made changes to index.html in both repos but only later sync them? Then you might run into a conflict, which we’ll cover in the next chapter.
Things we’ve learned
- How to use the Github desktop app
- How to clone a repo
- How to work with a repo on our local operating and file system
- How to sync changes with Github.com
…to be written


