
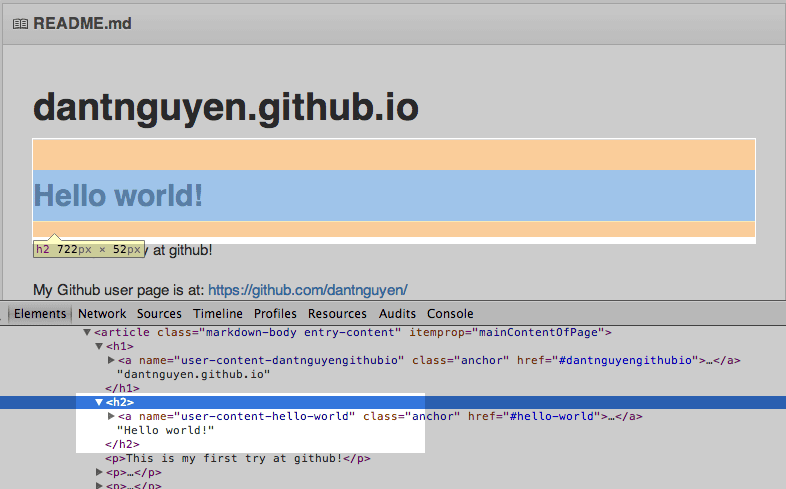
Publishing Web Pages from Scratch with Github Pages
In the previous lesson, we created a README.md file. And Github turned it into a webpage, technically.
But it’s just a quickie-homepage for our repo, with a URL that looks like any regular normal file (which, well, it is…):
github.com/username/username.github.io/README.md
Github provides a web publishing service called Github Pages. In this lesson, we will learn how to publish a proper webpage via Github Pages.
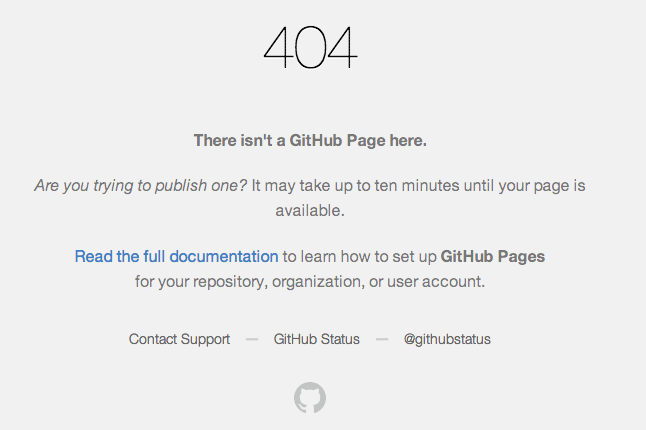
According to the Github Pages documentation, by creating a repo named username.github.io, Github Pages knows (by convention) to publish anything in this repo to the corresponding URL:
However, if you visit that URL, you’ll find a 404 page.
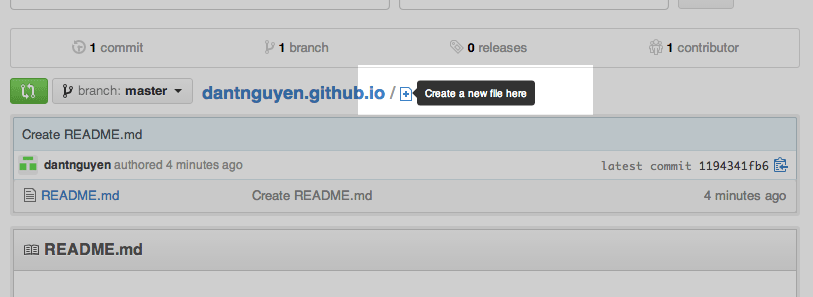
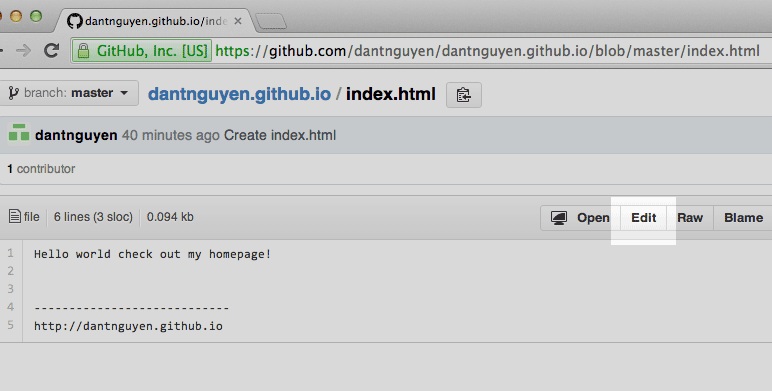
Create index.html
Go back to your repository homepage on github.com, e.g.
github.com/username/username.github.io
To the right of the repo name is a little paper-plus icon. Click on it to create a new file.
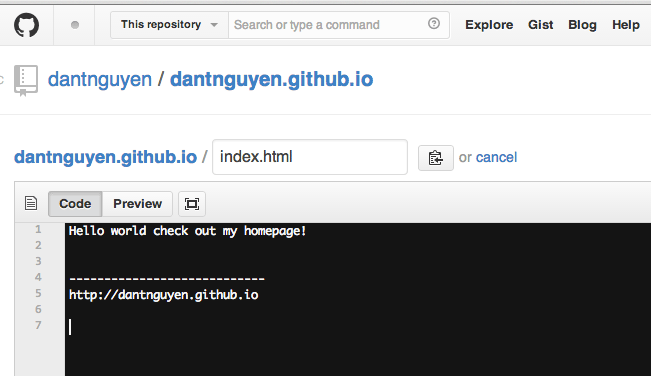
This will take you to the Github file editor. This time, you’ll have to specify a filename.
Name your filename: index.html
Then type in some plain-text nonsense, e.g.:
Hello world check out my homepage!


----------------------------
http://username.github.io
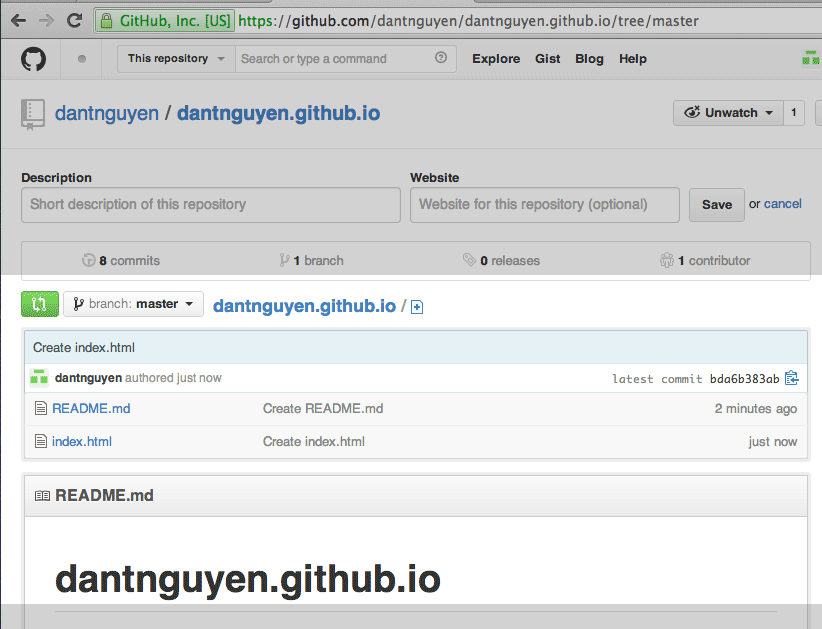
Commit the index.html file. You can add a commit message if you wish.
After the commit, you should be taken to your repo file listing, which should now contain two files:
README.mdindex.html
The README file should be unchanged because you didn’t touch the README.md
So what changed? Believe it or not, you’ve published your own webpage.
As per the Github Pages convention, your new webpage exists at:
https://username.github.io
And if you visit that address, you should see a very unimpressive page.
Behold, your new webpage (index.html) on Github Pages:
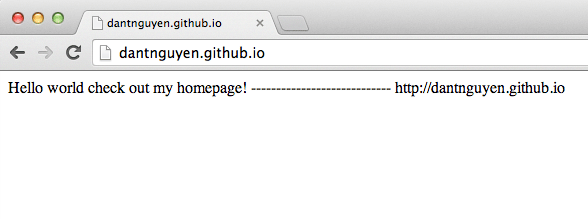
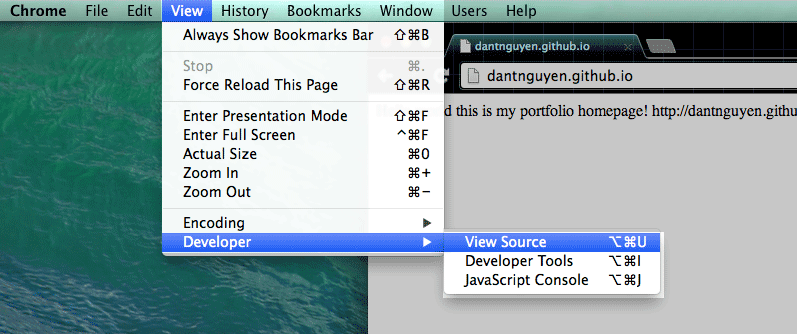
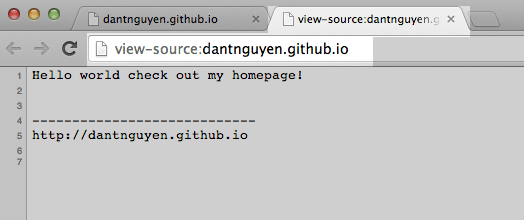
Not only is your homepage undecorated, but it lacks even the basic spacing between lines. If you View Source (either by right-clicking on the page, or by going to the View > Developer > View Source ) to see the index.html source code, you’ll see
exactly what you entered into the Github file editor.
And yet your browser renders it all as a single line. If you don’t know anything about web development, this is the explanation: the text you entered into index.html wasn’t actual HTML code. It was just, well, plain text. And Github Pages, unlike most blogging and content sites, did nothing to help you with that.
The raw source (i.e. the plaintext) behind index.html:
Web Publishing 101
If you’ve ever written a webpage from scratch, i.e. from the <html> to the closing </body> tag, you might already know the concepts (and can skip ahead). But if your Web publishing experience has been confined to posting in an “update status” box, or through your company’s content-management system, or even on your own WordPress/Tumblr, then what you’ve just done with Github Pages should seem very underwhelming.
And that’s OK. It’s underwhelming because Github Pages merely took the simple text you wrote:
Hello world check out my homepage!


----------------------------
http://username.github.io
– and put it on a public web server, as is.
So Github Pages basically did nothing here. It “published” your index.html page, if plopping it raw onto the Internet counts as “published.”
(Again, if you have any experience with web development, you should probably skip this section).
Go back to your Github.com repo page (not your Github Pages homepage) and examine the plaintext behind README.md
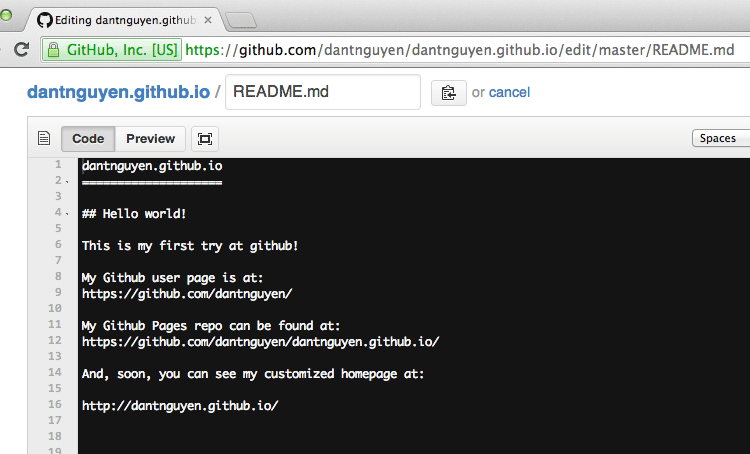
Now View Source of the rendered README.md (which, again, is visible by default on your Github.com repo page).
Notice how Github turned the plaintext behind README.md into actual HTML code; hence, why the headers and link text are properly formatted.
To get a proper webpage, with real HTML and all that, we’re going to have to write actual HTML ourselves.
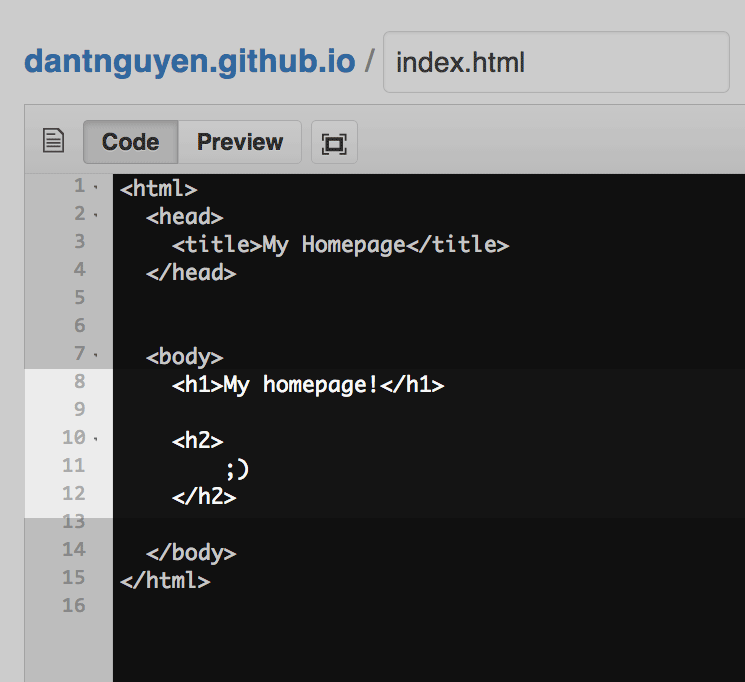
In your repo page and file-listing, click through index.html and click the Edit button, which will let you edit index.html via the Github file editor.
Delete all the plaintext in index.html and replace it with some HTML. Such as:
<html>
  <head>
    <title>My Homepage</title>
  </head>


  <body>
    <h1>My homepage!</h1>

    <h2>
        ;)
    </h2>

  </body>
</html>
Commit your changes. These should go into effect near-instantaneously, but feel free to take a couple-minutes break.
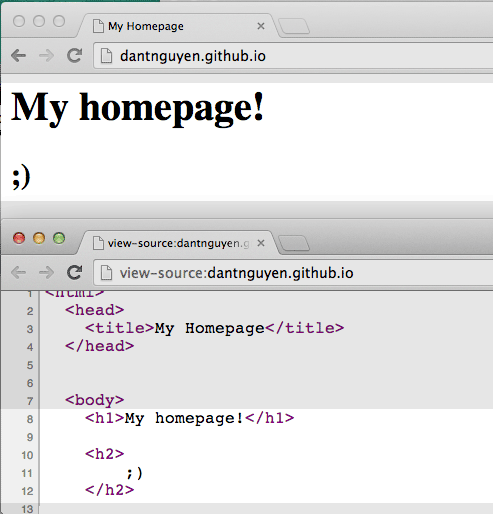
Then revisit your Github Pages homepage, e.g.
http://username.github.io
Pretty plain, but at least it’s a bonafide webpage; notice those properly-formatted h1 and h2 header tags.
Web publishing, with ease and brevity
So why even use Github Pages, especially if you have no intention of becoming a web developer or even learning basic HTML?
Good question. The simple answer is: In web publishing, as in basically every life choice, you have a tradeoff between:
- Power and control
- Ease and brevity
Github Pages sits more on the power-and-control-side of the spectrum. If you want to put something on the Web, Github Pages lets you do it from your web browser, rather than the traditional route of setting up your own FTP/Apache server (and by using Github Pages, you’re trading the power and control you have by setting up your own web server).
Placeholder kitty
With a service such as WordPress, you get the ease of creating web content with a rich-text editor, similar to a traditional word-processor.
When you hit Publish Post, WordPress takes care of wrapping your post content in HTML code and putting it in a reasonably pretty container. The tradeoff is that you can’t (easily) break out of those boundaries, not with out learning enough code to hack around WordPress.
It took me about five minutes to create a new blog on WordPress.com, pick a pre-built theme (ThemeTrust’s “McKinley”), and create a new post, with a headline, text, link, blockquote, and even some tags.
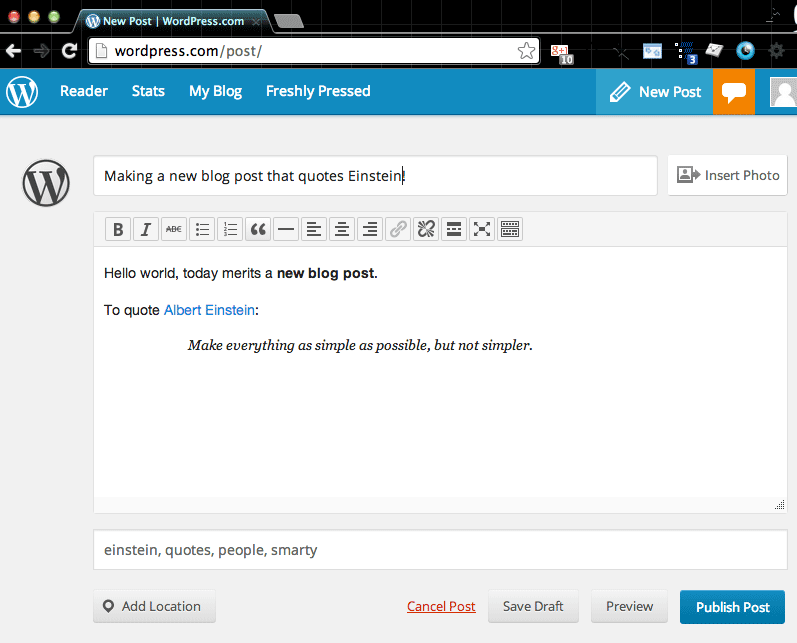
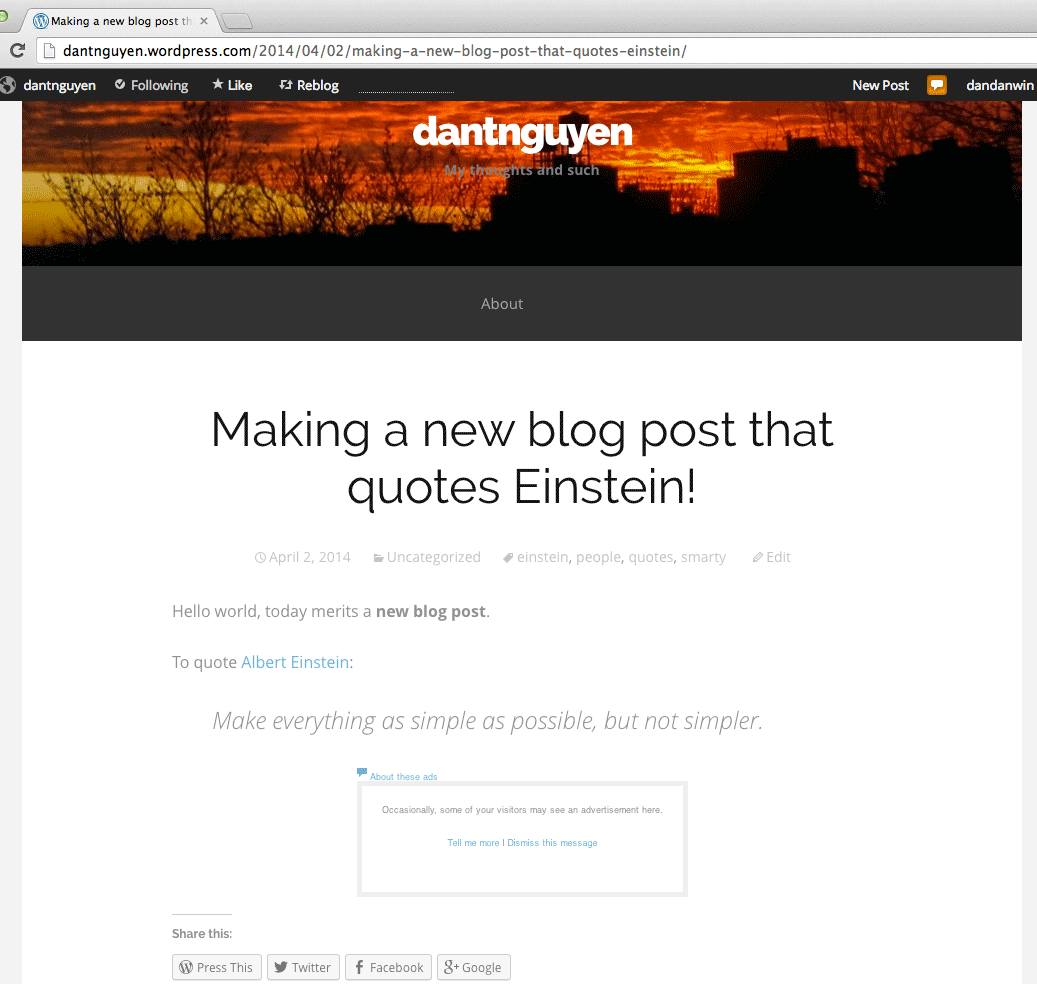
WordPress helpfully formats my post and fits it inside the pretty McKinley theme I’ve chosen. Check out the live version and notice all the niceties that WordPress adds, such as making “Albert Einstein” a clickable link. And notice the extras: the tags are also clickable-links, a date has been added to the post, there are Share this: social buttons, and ooh, a courteous notice that my post might show ads, because I am, after all, using WordPress’s free service.
If you want, you can go back to your Github.com repo page and create a new file, like: blog-post.html, and add the same content that I’ve added to my WordPress post.
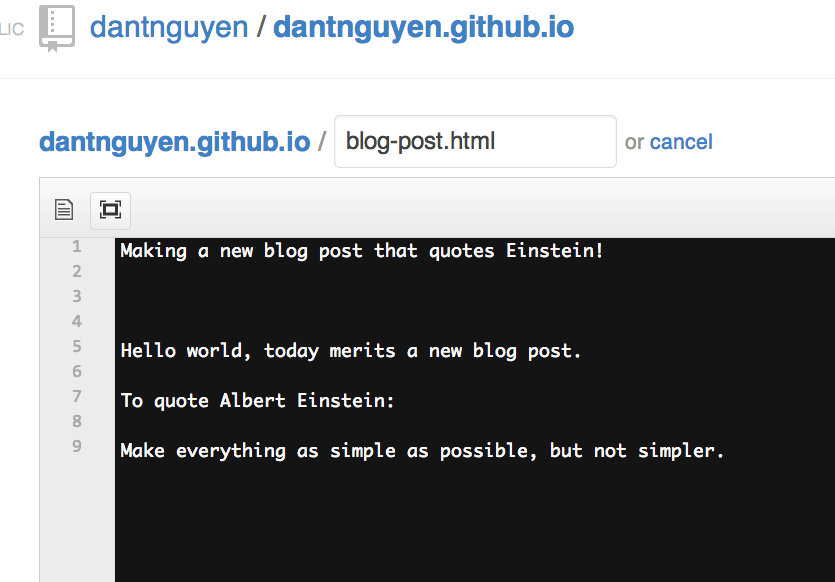
Commit the new blog-post.html file, which will be auto-published by Github Pages, and visit it at:
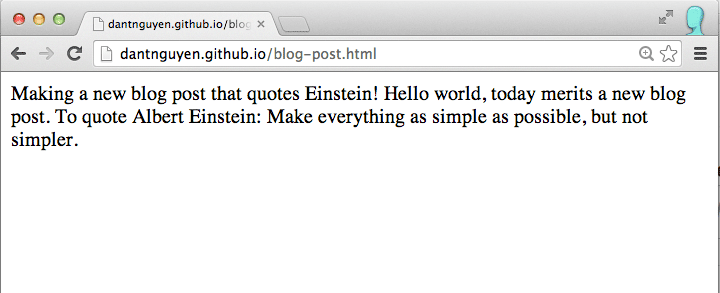
username.github.io/blog-post.html
And again, Github Pages does basically nothing.
Web publishing, with power and control
But sometimes nothing can be a pretty cool hand…as in, being handed the reins to create and publish content exactly as you need it to be.
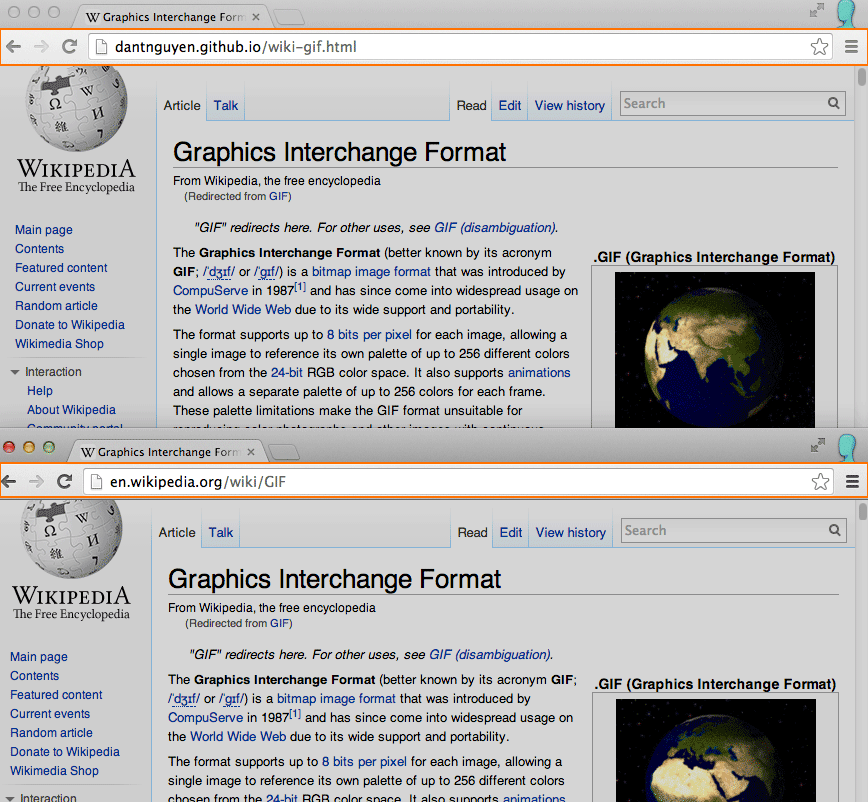
Visit the Wikipedia page for GIF:
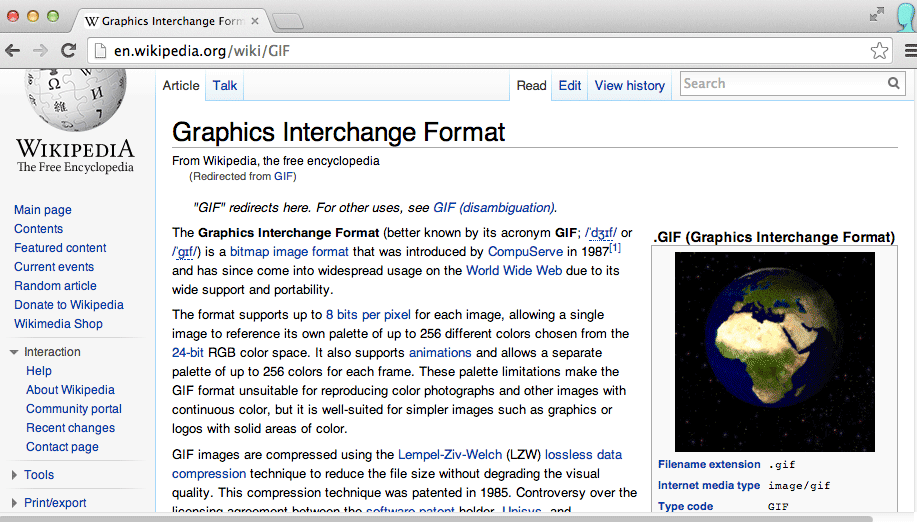
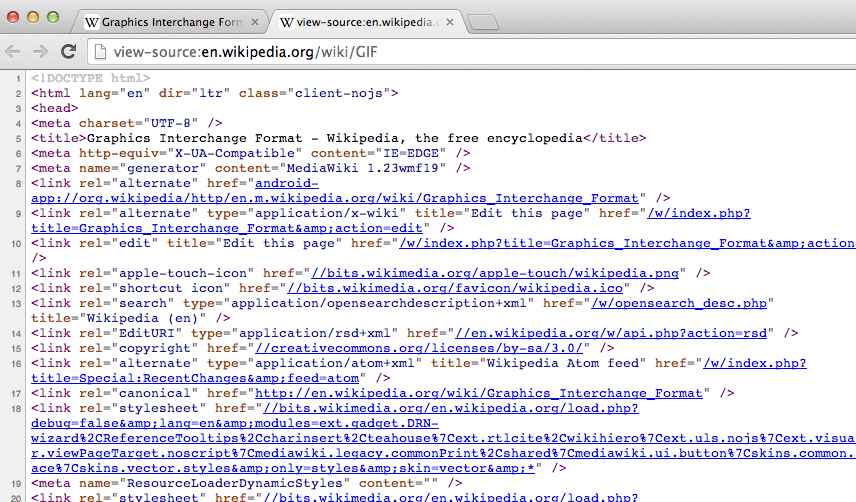
View Source of the Wikipedia entry on GIF, and then Select All the code and Copy it to your clipboard (i.e. via Ctrl-C or Cmd-C)
If you have a WordPress blog, you can follow along as I try to paste this massive chunk of HTML code into the WordPress post editor (in the raw Text mode, not the Visual mode)
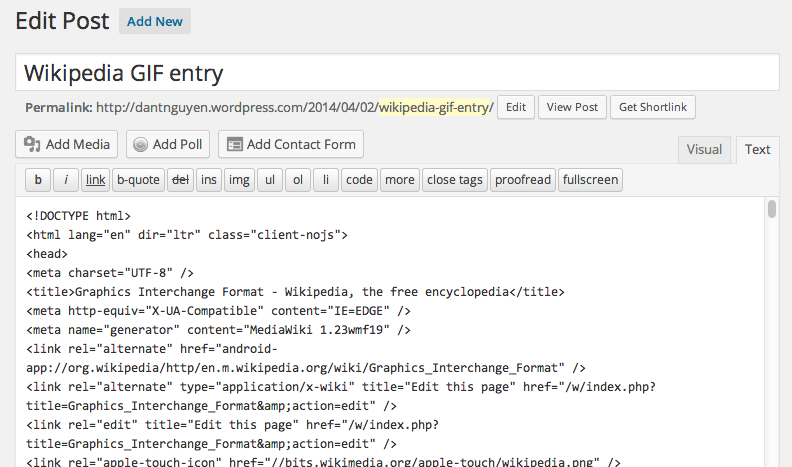
Some of the raw HTML is interpreted correctly, but we lose all of the styling of Wikipedia. And for much of the HTML code, WordPress just basically barfs it out as raw text.
By having a user-friendly interface, WordPress necessarily has to make assumptions about what users often mistakenly copy-and-paste, and these assumptions end up being restrictions, to some degree.
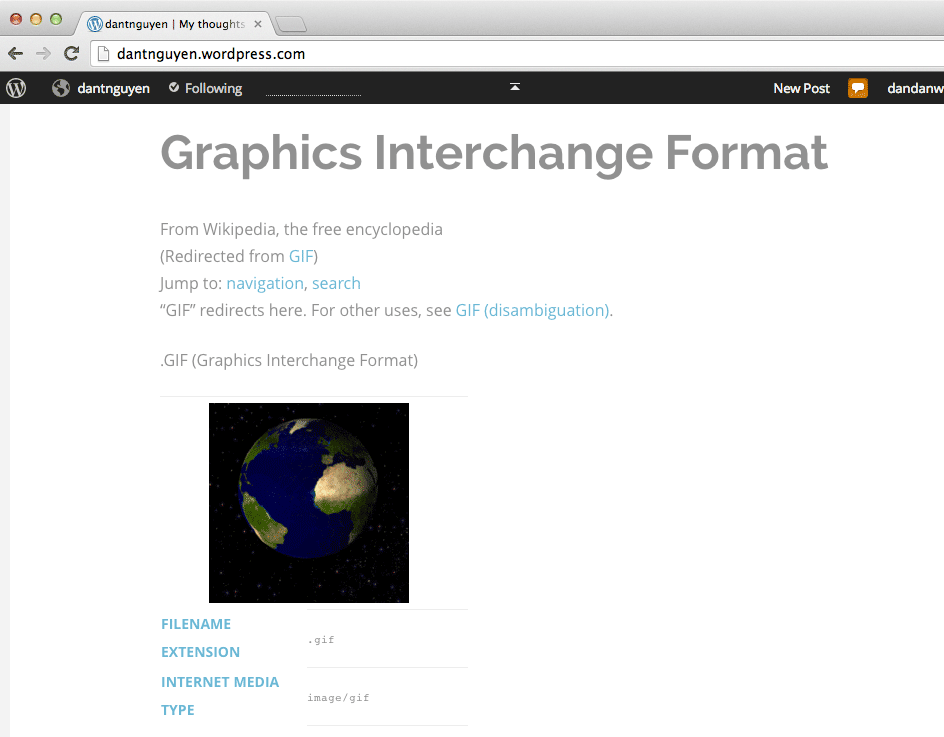
You can see the attempted raw-Wikipedia-HTML-as-WordPress-blog-post on my sample blog.
Now copy-and-paste that same raw Wikipedia HTML into a new file in your Github repo, e.g. wiki-gif.html.
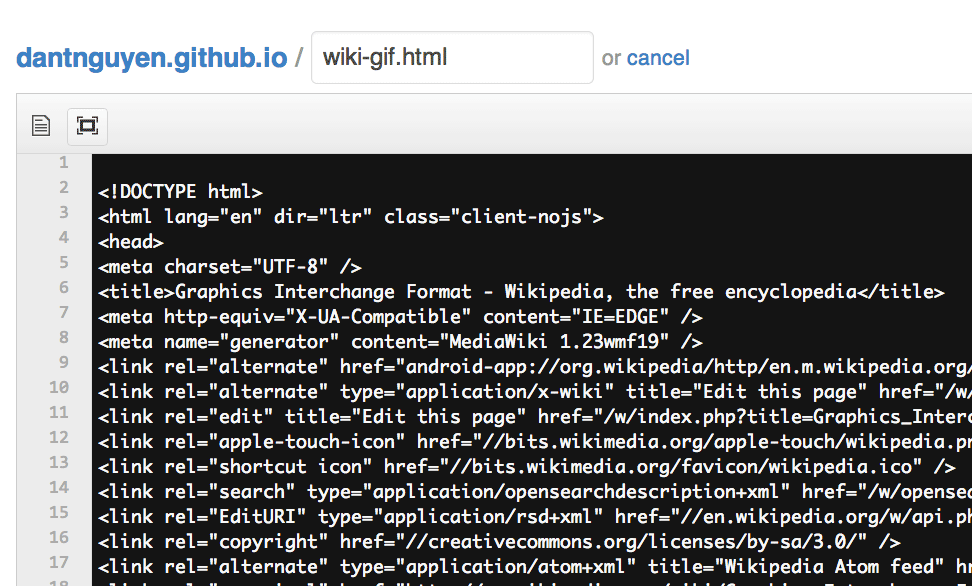
Commit the new wiki-gif.html to your repo.
Wait a second for Github Pages to auto-publish that page and visit it at the expected URL:
http://username.github.io/wiki-gif.html
The two pages are identical, from the content, to Wikipedia’s exact styling, even down to the revolving-GIF.
Things we’ve learned
How to publish to Github Pages
Github Pages is a service run by Github that, when properly configured, will auto-publish the contents of your repo onto the Internet.
To get Github Pages to work for you, if your username is your_username, then you must create a repo named your_username.github.io.
After about 10 minutes, you can expect your content to be on the Web at the URL: http://your_username.github.io
Going forward, I will refer to this as your portfolio homepage/website
Note: When I refer to the Github repo homepage for your portfolio, I mean the URL of the actual Github repo, e.g.:
https://github.com/your_username/your_username.github.io
Placeholder kitty:
The basic structure of a website
TK
Placeholder kitty:
How plaintext is different from raw HTML
TK
Placeholder kitty: